Chevy II Nova Gasser: Week to Wicked Day One Recap
Welcome to day one in MotorTrend Group’s Santa Anta Tech Center. We’re rolling in our stock 1967 Chevy II Nova for a one-week transformation from grocery getter to gasser in 5 days!
Today’s build we have a lot of things to do. We’re going to dismantle the car, bolt in the front and rear suspension (straight front axle), and get the brakes going. So let’s get going!
We start with removing the wheels and getting the cross member bolts undone. We’re taking the hood off as part of dismantling the car as well.
The first step will be tackling the radiator, core support, engine and transmission. The Nova does not have a V8 to start with, instead, we're working with a straight-six. So we will be replacing that with a big block Chevy, which we are really excited about!
We rig up the engine and just like that the straight-six is gone. 14 or 15 bolts later the front clip is slid out and rolled to the other side of the shop. We’re now going to prep the area for the front axle kit, but before we do that we’re going to get the rearend out so we can get working on that too.
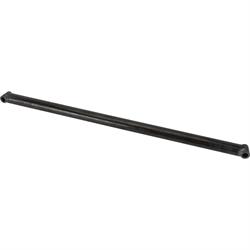
We have the Speedway Motors complete gasser front suspension kit laid out and we’re ready to start assembling it. The guys note how simple and straight forward it is to put together. This kit has our new heavy-duty straight axle that is 3/8 of an inch thick instead of a ¼ of an inch thick. It’s a difference you can feel holding the axle. It’s a little extra weight which is good in our case. As that is coming together, Christian is greasing bearing with a handy tool that they have in the shop. This tool pushing grease through to the bottom of the bearing and the excess can be spread around the outside.
Now it’s time to assembly the spindle to the axle which is held in place by a kingpin. Make sure to align the notch in the kingpin with the set screw that locks everything in. Once the flat spot is lined up, tap it in. When setting the spindle on the axle, first place the bearing in, and then look for which side is deeper than the other. On the caliper brackets, the spacers should be on the inside.
Next, the team moves on to installing the Speedway Motors 11” disc brake kit. After that, they ensure the cone washer is between the caliper bracket and the heim joint when they attach the rod. The steering box also goes in while everything is getting prepped before it goes on the car.
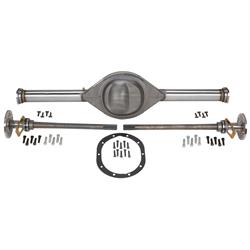
Moving on to the Speedway Motors’ Ford 9” rear end housing and axle. The monoleaf is installed, so it’s time to get the housing in and then we can assemble everything from the axles to the brakes, third member and shocks.
Overall, the parts bolted right in. The rearend is installed, the front clip is attached and we’re ready for day two!