Engine Cleaning and Refinishing - 54 Chevy Restoration
As most people could tell you, I’m very big on doing everything you can to spruce up your ride. Even if engine removal isn’t in the cards for your hot rod project, you can still have a very nicely detailed engine bay in your car.
The ’54 Chevy shown in this article was a running car that had been in long-term storage when I started with it. It was functional but very dirty and sort of thrown together. I’ll show you step by step how I cleaned and refinished the engine and surrounding areas. They don’t call me Captain Krylon for nothing!
The first thing to go was the scary wiring. Almost every abandoned project car I’ve ever purchased was cobbled together when it came to wiring. It’s still a great source of mystery and scavenged junk yard stuff to many folks. Please, do yourself a favor and buy a quality wiring kit. It’s neat, clean and pretty bullet-proof if you follow the directions. You can do it.
This car received our 20 circuit kit because A/C was in its future. This kit is now even better and has become the 22 circuit kit to accommodate more accessory circuits. I didn’t have a smartphone back when I wired this car or I’d do an article on it as well. Trust me, get one of our kits. 910-64022 if you plan on A/C, electric fan, etc. 910-64017 if it’s a bare bones ride. The time you’ll save is worth the bucks.
Now then, after the wiring in the car was replaced and routed correctly I began to degrease and dismantle. I usually leave the engine sealed up and soak all of the offending areas with Castrol Super Clean. It’s the best stuff I’ve found to cut through years of grease and leaves a clean and dry surface that will accept and keep new paint. After the degreaser has a chance to work, scrub everywhere you can with a nylon brush. Then power wash the block and surrounding areas. Another neat feature of the Super Clean is that it’s a safe biodegradable formula that you can wash down the drain.
After everything dried out I went ahead and removed the intake manifold and old valve covers. I had already removed the headers and replaced them temporarily with block off plates prior to washing. This allowed me to really get at the sides of the block and oil pan.
I love aluminum foil. Period. It’s hands-down the best masking material money can buy. It can conform to any shape, no paint type will ever bleed through, you can tape to it, you can wrap awkward items entirely. Be sure to get the heavy duty stuff though or your experience will be a frustrating one.
Finned aluminum is one of those things that can really set off an engine bay. Especially when a person takes the time to detail it correctly. In my opinion, fins should ALWAYS be detailed with paint. In this case with the same color Detroit Diesel green as my engine block.
Another favorite from my detailing arsenal is blue 3M Fineline® tape. I keep 1/8” and ¼” wide rolls on hand. It’s the same stuff I use to layout flames and mask graphics but has thousands of more practical uses. Like masking valve cover fins. It’s not an exact fit but it’s precise enough to make you look like a real pro when the paint dries.
Time to start putting a dent in that parts pile...
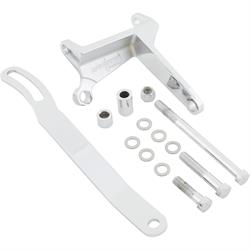
I opted to also replace the intake manifold. Both for aesthetic and performance reasons. It was made for a quadrajet carb, and there’s nothing wrong with them but I wanted to equip this car with an Edelbrock carb. That meant using an adapter plate on the old spreadbore manifold if it was retained. I see each additional gasket as just another opportunity for a vacuum leak. Bolting the carb directly to the manifold was the route I wanted to go. It was all topped off with a chrome alternator bracket and finned 14” air cleaner.