The Day We Heard Her Purr
As we get closer and closer to the end of our build, it seems like our days are no longer dedicated to just one ‘task’ anymore. It’s more like, ‘Crap! We have to do this… and this! And this!’ That’s exactly how this build day was – lots to do and so little time. I’m telling you, LOTS to do. (Just ask the visitors that stopped by and reminded us… helpful guys… reallllllly helpful.)
Our main goal for the day was to get the engine started. As long as we could get it to turn over, it meant MOST of our things were correct and we could move forward with getting the body on. Which would be huge, because after the body goes on, we could move on to wiring, gauges and upholstery, fenders, blah blah blah. Baby steps, but we had to keep the project moving. But BEFORE we could start her up, we had to get a few other to-do’s checked off the list first.
I took on my usual crafty type task- I undid all of the plastic wrapping around the wiring. Throughout the build it had gotten pretty dirty so we ordered some Painless Performance ClassicBraid Wiring Sleeving in ½, ¾, and 1 inch sizes. I re-wrapped all of the wires in the new casings, cut the sleeving at it’s appropriate lengths, then taped them at the ends with electrical tape. It’s small details, but so much cleaner looking- especially when so much wiring is exposed near the engine and front end, you really need something ‘pretty’ to cover it up!
We promise they didn’t pay for this endorsement, we just REALLY liked the product!
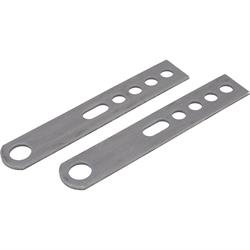
As I focused on things that really didn’t matter, #cuteasabucket changed out our panhard bar (too short) for a longer swedge tube to help stabilize the rear end. Basically, the originally bar had too many threads showing on our heim joints – which isn’t the safest or the sturdiest, and there wasn’t an available panhard bar in the length we needed, so we improvised. Last week we also realized our exhaust hanger brackets were too short – we couldn’t properly bolt them in because when they held the exhaust up, the exhaust kept hitting the rear end. We ordered longer brackets and installed those, which allowed more clearance for the exhaust. Since our exhaust was now held up like it needed to be, we were also able to finally tighten up the exhaust clamps that secured them in place.
Last item on the to-do list for the day – installing our headlight housings! The bucket was finally getting its face!
Before we could get her started, we needed to add some tranny fluid but had absolutely no idea how much to add. #tinyT went to trusty Google to ask and found out that you need to add about 10 quarts to a dry TH 350 transmission. Each of us got our own bottle and were 100% ready to get pouring. After three quarts, the funnel started to overflow a bit (okay, okay, it was a lot and it made a huge mess) and we realized it was all it could take for now. As it turns out, when you actually start the car the torque converter will fill up with tranny fluid, as well as the lower part of our radiator. It will be able to take the remaining seven-ish quarts. After much preparation and a fire extinguisher nearby – lowww and slowww, right #bucketbetty? – we cranked her over and heard our baby purr for the very first time! I’m no mother, but I like to think it’s just as exciting as a real baby crying for the first time… Maybe. Still lots to do, but at least we’re on the right track! Adios amigos,


