Vulcan Redux Part Three
If you’ve been following this project series you know it’s almost time to start spraying some paint. If you haven’t been following the series, click your back button and start at #1. You’re not supposed to be here. Go. Now, I mean it.
Paint
This is the part of a project that I truly like best. It’s the single most impactful change you can make to a vehicle. It’s also the messiest, biggest pain in the butt that you can possibly bring upon your home garage. That’s why I usually only do it every three to five years or so. It gives enough time to forget how much I hate it and romanticize my love for the result. I guess it’s just about time to do it again...
The only real “body work” that needed done was where I filled the rear fender. We covered that in the last segment. (Seriously dude, go back and read it.) The only part of the “tins” on this bike that are actually metal is the tank. The fenders and side covers are a rubbery kind of plastic that’s hard to block sand and even harder to buff. Not much new to see here. Omni primer sprayed through the fat tip.
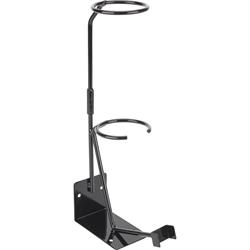
This is where some of the Speedway products I used really come into play. It was for this project that I purchased the Titan spray gun. I also purchased the holder stand for the spray gun a short time later.
Do you recognize the color of the paint all over the bench, wall and floor in this photo? Yeah. Turns out I’m far too clumsy to hold the paint gun and fill it at the same time. I spilled a little bit of paint on my hand and lost my grip on the whole rig during the paint-soaked flinch. Of course, this was after I had the gun 3/4 full. Sort of like falling down some stairs and trying to catch yourself, I caused far more carnage in my feeble efforts to catch the falling, slimy, tumbling paint gun, than had I just let it go.
It also turned out that I had mixed enough of the pint of single stage paint I bought that I didn’t have enough material left to cover the parts. Off to the paint store again, I guess.
By the time I cleaned up what I could of the mess, myself and made it to the paint store and back, it was dark. Now I know what happens in my garage when I try to paint things in the summer time after dark. I get bugs. Lots and lots of bugs landing in my fresh paint.
Did that stop me from forging ahead with my vow to get paint on this project before I left for vacation the next day? No, I didn’t because I’m stubborn, and evidently I’m stupid too. The paint did what paint does, it sprayed out nice and smooth and flowed out nicely. Just as it started to tack up, that’s when the mosquitos came. Hordes of them.
Well, that went poorly. I guess it’s not that horrible though. I can pick the bug legs out and sand and buff the parts, right? No biggie.
Biggie. After returning from a week of vacation I set out to color sand (something I hadn’t planned on with this) and buff it all back smooth. Things went okay. At first.
I got everything sanded flat and smooth. Then I got to the back fender and it flexed kind of weird, caught the pad and I shot it across the shop with the buffer. The collision also cracked the fresh paint. Fantastic.
Since I already needed to repaint one of the largest parts, I made the decision to go ahead, sand and repaint the whole mess. In the early morning. When the bugs aren’t attracted to the light. Like a smart person would do. (Disclaimer: I’m not a smart person but I do consult them from time to time)
Success.
From there the main carcass of the bike got some finish changes. As I mentioned before I’m not big on chrome and glitz. I bead-blasted most of the chrome parts and either painted them black or left them dull silver. This is a really striking way to make the chrome items you want to stand out, really pop.
I also bead-blasted and epoxy painted the wheels black. Again, working to great effect to create subtle tones and textures that set off the whole package.