Menu

Shop

Garage

Cart

Account

Products to Compare (max of 3)
X
Compare These Parts

Vulcan Redux Part Two

12/5/2016
Add Article To List
Tags: Tech, Kawasaki

Welcome back to the Vulcan Drifter project! Last time I touched on all the extra “stuff” this bike had hanging off of it. It’s about time we do something about that.

I also mentioned previously that I’m not a big fan of chrome just for chrome’s sake. This attitude rubs a lot of bikers the wrong way. Street rodders too. Trust me. I’m a designer and the picture in my head is awesome. Now, let’s get rid of that awful headlight and menagerie of chrome on the rear fender.

Whole lot going on there...
The fish tails were a touch over the top. Turns out, Speedway has a great return policy too!

I started where you should always start a project. With the Speedway catalog. I wanted to get rid of the clutter and I wanted to end up with black painted headlight and turn signal buckets. I also wanted to pull the headlight way back toward the triple tree and get the signals tucked inside the width of the forks.

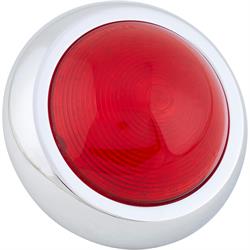
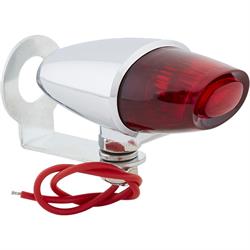
I decided on a Dietz headlight with a painted bucket and chrome trim. For the front turn signals I splurged on a really nice set of stainless ’32 Ford cowl lights. For the rear signals I went with our Pony lights just below the new springer seat mounts. A ’50 Pontiac tail light was a must. It keeps that clean and simple Indian style but with modern LED visibility and a low price to boot. Plus when you’re working on a bike, you get an extra head and tail light too! How can you beat that?

In order to use all of these parts I needed to fabricate some new mounts. No hill for a climber. I started with the new headlight mount. It’s built from part of the original light mount and some 1”x2” channel that I had in the iron rack. Once I settled on the positioning I trimmed, drilled and contoured the shape.

The economy of design is a big part of a cycle build. So my turn signals will also mount from this point as a sandwiched layer. That mount was made from ¼” aluminum bar. Since It would need to be twisted in the center I used a material that was easier to form. This twist is because the ’32 lights are made to be mounted on the tapered cowl. Also worth noting: All the parts attaching here use an indexing pin to keep the alignment true and use just a single center mounting bolt.

The rear fender was quite a bit more straightforward. Much messier, but straightforward. I removed all of the factory stuff and threw it in the scrap heap. Then I fished the back bumper out, cut half of it off and put it in the “save” pile. The fender had a big cavity in it for the factory light assembly. Since the LED lights are flush mount there was no need to keep that. I ground off the box from the back side and ‘glassed the hole shut with regular fiberglass mat and resin. The light required three holes. Two to mount and one for the wires.

Stay tuned for the conclusion of the project in Part 3 – Vulcan Drifter Paint & Reassembly

Products Featured in this Article

Related Articles

Vulcan Redux Part Three
by Jeff Karls - Posted in Tech
12/5/2016
In the last installment of Jeff K.'s Vulcan adventure, Jeff tackles the paint of the motorcycle. A couple of times.
Vulcan Redux Part One
by Jeff Karls - Posted in Tech
12/5/2016
Product guru Jeff K. doesn't just limit his revival tendencies to those of the four wheeled variety. He also likes to leave his mark on motorcycles, giving new life to tired old two-wheelers. Follow along as he tackles a 2004 Kawasaki Vulcan.
What Is an HEI Distributor? Setup, Tuning Tips, and Pros & Cons
by Brian Caruth - Posted in Tech
5/15/2025
Learn how HEI distributors work, how to wire and install them, and why they’re a top upgrade over points ignition systems. Includes tips on testing, vacuum advance, and DUI distributor benefits.
Best Type of Mufflers to Create the Perfect Exhaust Note
by Mark Houlahan - Posted in Tech
5/14/2025
From glasspack, turbo, and chambered mufflers, to resonators, and more, which muffler is best for you? See our guide to learn more.
Axle Ratio Calculator | Calculate Ideal Tire Size & Rear Gear Ratio
by Mark Houlahan - Posted in Tech
5/13/2025
Easily calculate the best axle ratio or tire size for your build. Use our axle ratio calculator to match RPM, gear ratio, and tire diameter for optimal performance.
Fuel Filter Micron Ratings | Everything You Need to Know
by Mark Houlahan - Posted in Tech
5/7/2025
Why are fuel filters offered in different micron ratings, and which one is right for your build? Learn why EFI and carbs take different filters.
Pontiac 350 vs Chevy 350 | Pontiac 350 Engine Specs & HP
by Jeff Huneycutt - Posted in Tech
5/1/2025
Why was the Pontiac 350 phased out for the Chevy 350? Discover the key differences, performance, and advantages between these iconic GM small-block V8 engines.
Aluminum VS Cast Iron Heads | Are Aluminum Heads Worthwhile
by Jeff Huneycutt - Posted in Tech
5/1/2025
Aluminum vs. cast iron heads—what’s better for your build? We break down power, weight, heat, and cost to help you choose the right cylinder heads.
How to Diagnose Lifter Tick vs Rod Knock | Troubleshooting Tips
by Jeff Huneycutt - Posted in Tech
4/24/2025
Lifter tick vs rod knock—what's the difference? Learn how to identify these engine noises, their causes, potential damage, and how to fix them.
Camaro Curb Weight Reference Guide | Camaro Weight by Year
by Mark Houlahan - Posted in Tech
4/18/2025
Knowing how much your generation of Camaro weighs will help you determine shock settings, spring choices, and suspension setup.