3rd gen Camaro Custom Steering Column Install
When I purchased my '92 Camaro the stock steering column had a lot of play, wasn’t very appealing and it was fairly heavy. After looking at Team Speedway's '67 Camaro, I decided to put the same style steering setup in my track car.
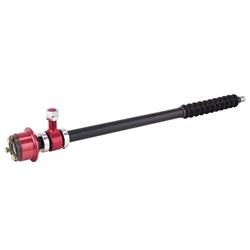
I chose the Sweet Manufacturing Collapsible Steering Column, part #91032299. The collapsible portion not only makes the column safer in a crash situation, but it also gives you length adjustment. There are also many different mounting options available for this column. I’m going to be using the column support rod end that was supplied with the kit. In this build, I’m also going to be installing a temporary column support. Eventually, the plan is to build a mounting bracket from the roll cage to the column mount rod end.
For a steering wheel, I chose the Pro Aluminum Racing Wheel, part #47556797. It has a nice suede-wrapped rim with a good grip and a black anodized aluminum center. The wheel is a 15” diameter, which was very close to the stock wheel size.
First, I removed the stock column and steering shaft leaving only the steering box. After removing the stock column this left a large hole in the firewall and left the three OE column mounting holes on the firewall available for use. I took measurements of the mounting holes and the shape I would need to cover the large opening. I then sketched out a cover with the bolt pattern of the mounting holes.
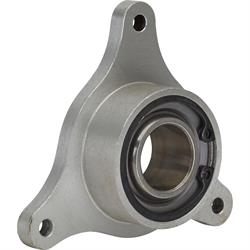
Next, I purchased Firewall Mount Steering Shaft Bearing, part #910102. I measured the bearing bolt pattern and sketched it onto the cover with a hole where the shaft will be coming through the cover. After verifying the design, the cover was cut and the holes were threaded to attach the bearing. I also put a large chamfer on the shaft hole allowing the shaft to pass through at a large angle. After bolting the bearing to the cover I attached it to the firewall using the OE hardware.
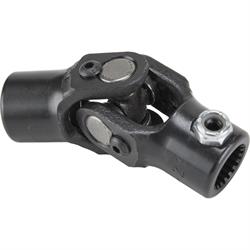
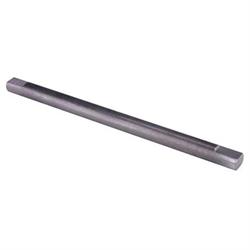
I then needed to figure out an ideal placement of the steering column. I mocked-up my seat in the car where I thought it would be a comfortable driving position. I purchased the ¾-20 to ¾” round u-joint and a piece of double D steering shaft. I attached the steering wheel, u-joint, and shaft to the column and inserted the shaft through the bearing. I positioned the wheel correctly and temporarily wired it to the stock column mount.
After the column was in place, I made a sketch and wrote part numbers labeling the parts I would need to finish the steering shaft. Once I got all the parts I still needed to cut the shafts to the correct lengths. I cut the DD shaft to a round end on the column side. I left the shaft long enough for a DD to round u-joint to be attached on the opposite side of the firewall. I then cut the ¾-inch shaft to the correct length.
With this many u-joints in my assembly, I needed to install a shaft support. After all the shafts were cut I mocked them up in the car. I then placed an oversized heim for steering shafts onto the shaft inside the engine compartment. To connect the steering box to the DD shaft - I used a 3/4-30 spline to 3/4 round u-joint. The round end u-joints were then welded to the shafts. Next, I designed a bracket to hold the oversized heim, which will weld to the car.
As I stated before I eventually will be making a bracket from the cage to the column support rod end, but until I have the cage installed I wanted something to temporarily hold the column in place. For this, I used Weld-On Steering Shaft Bracket, part #91032720. I made a flat piece of steel with two holes that matched the OE mounting column holes. I then welded the bracket to the flat piece in which the rod end could be attached to. With that, my steering column and linkage was mocked up! It's not quite rigid enough for driving, but it will be good enough to maneuver the car in the garage.