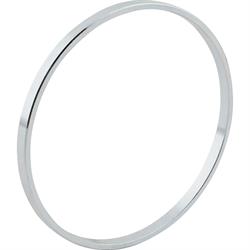
Installing Spacer Rings on Buick Brake Drums
Late ‘50s Buick aluminum finned drums look great on any hot rod, whether it is a throwback styling queue on a modern hot rod or a must-have set up for a traditional car. I chose Buick brakes because they are what I fell in love with when at the age of 15. I saw a righteous ’34 Coupe with 45 fin Buicks.
If you have watched my YouTube video, which talks about how to modify and install original Buick finned drums, there is a moment in the video where I talk about Spacer Rings, available through Speedway Motors. These rings were created to help center the Buick drum on the hub if you are using new Speedway ’40 Ford Style Hubs, and a set of original Buick “finned” drums.
If you would like to learn more about these spacer rings, this article is to give you some visuals while talking through the process of installation.
There are multiple ways of installing Buick drums on your hot rod. This particular article covers the way I did it using a hybrid of old and new parts. Here are some optional setups you might consider if you have not yet sourced your pieces:
Original Equipment Buick drums (sourced from a salvage yard or swap meet) and Original Ford hubs
Original Equipment Buick Drums (again sourced survivors from the old days) and New Speedway Hubs
New Speedway Buick-style Drums and New Speedway ’40 Ford Style Hubs
I always live by the notion that “old is gold” because I love vintage parts. But in this case, if you have not yet found a set of old school drums, you might consider option C. Not only does it work well if you plan on driving your car, it all fits together perfectly, and replacement parts are at your fingertips when you need them! If you want a set of primo, brand new drums check out these Buick-Style Finned Brake Drums.
If you are like me and opted for option B and want to know more about the spacer rings, please read on!
In the first picture, you can see my brand new, yet unpainted hubs obtained from Speedway Motors, installed on the spindle with the ’40 Ford juice backing plates in place. The bearings are greased, and I am ready to test-fit the Buick drum.
My drum already has the bolt pattern pre-drilled to the large 5 on 5 ½ pattern to match the hub and my early ’40 Ford wheels. It is a bit like Swiss-cheese with all of the holes! Some were the rivet holes that held the original Buick hubs on the drums, and the patterns are original Buick and the newly drilled big-Ford bolt circle.
As you can see from the picture, there is a space between the hub snout outside dimension and the drum center inside dimension (ID). Many have had fine luck allowing the drum to be centered on the lugs, and that is completely ok. Because of a little slop in my lug holes and because I like things to be snug and tidy, I decided to have a spacer ring made to help center the drum perfectly.
In this image, you can see the prototype spacer ring in my hand before installation. I took measurements to ensure a snug fit between the ring and the hub. I had to tap my ring onto the hub with a light mallet. It didn’t take too much force, just a few light taps, and it was on. I was happy that it was just tight enough to ensure it wouldn’t go anywhere. If your ring is a snug fit, you might also consider heating it up prior to installation. The expansion of the ring while hot should make it slide right on.
Once the ring was on, the Buick hub dropped right on. I gave it a spin to ensure it felt balanced and symmetrical. With old ford brakes, it is easy to feel when something is lop-sided and catching a brake shoe!
Once mounted you will notice the ring is recessed from the outside face of the drum. This is perfect, as we did not want it to interfere with various wheels.
I hope the pictures help, and you are on your way to giving another old set of 45 fin Buick drums a new lease on life. If you are interested in learning more about making Buick drums work using old hubs, please see our YouTube video!


