Disc Brake Conversion
For those who have the privilege to own an iconic muscle car, such as our 1968 Charger project, we can understand how reluctant one may be to modify or “convert” any part of your pride and joy. Unless your classic is a numbers matching or “one of so many”, it is definitely a lot easier to warm up to making a much needed upgrade. Alas, once you get to this point, one must consider overcoming their brand sensitivity (if such exists) and start the journey to a better handling, better performing, and better braking ride by making the conversion from Mopar to Mustang II with this Complete Disc Brake Kit for Mustang II spindles.
If you’re wondering, this kit is not specifically intended for Mopars. It just so happens that one of our latest additions to the car was a custom built front k-member sub-frame based off of the popular Mustang II design. This meant that the upgraded chassis required the use of Mustang II style spindles to fit the build. This was a much easier option than trying to convert Mopar spindles, therefore allowing us to do away with our original bulky drum brakes and install this brand new set of 11-inch discs to increase our stopping power drastically.
This kit would be considered a more economical approach to getting the job done, as there are a variety of disc brake kits designed for Mustang II spindles. Nonetheless, this kit was very easy to install and gets the job done just as well as some of the more expensive brands.
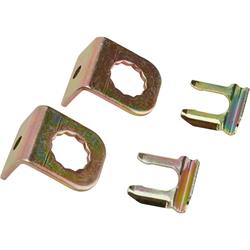
With the spindles in place, the first item of installation was the mounting brackets for the calipers. These simply bolted on to the spindle, ensuring that each bracket was parallel to the soon-to-be-installed rotor. Each bracket bolt was torqued according to the included instructions and thread locker applied to each as well.
Next, we would slip on our new 11 inch rotors. Before doing so the new Bearing-Seal Kit needed to be installed in each disc. For this step, we began by packing each bearing with grease to prevent future bearing failure. Bearing grease such as Lucas Oil Red N Tacky, worked great for this. Here you can pack like we did the old fashioned way, by loading grease in the palm of your hand and digging the bearing into the grease ensuring that it gets forced through all of the bearing rollers.
Alternatively, Speedway Motors carries a grease Packer Tool for those who wish to avoid the thrill of getting a little greasy. For the remainder of the bearing installation, we were careful to insert the new bearings in each rotor, following up with the seals. For these, a rubber mallet and caution were key as we gently tapped each in being careful to avoid damage as well as an uneven fit. Now was time for the rotors (with wheel studs already installed) and the spindle nut/washer kit with supplied rotor caps to keep any dust or dirt out of our freshly packed bearings.
With our new stopping surfaces in place, we were glad to add the stopping force. The included calipers and brake pads went together quickly, paying attention to the instructions and greasing the slider bolts before installing. One step included in this process was to compress the caliper pistons to allow for a clean and simple fit over our new discs. This was done with a Heavy Duty C-Clamp commonly found in most shops and garages, or at Speedway Motors. The compressing was done with the new brake pad clipped in place over the piston to serve as a flat even clamping surface.
Finally, before installing the wheels came time to plumb up the new brake hoses. This was a simple step by connecting to the original hard lines already routed from the junction block. With the proper fittings and hose tabs supplied, the hose portion of the install was a breeze. Now we could bolt a couple of lugs on to test fit our wheels to ensure the necessary clearance was as intended.
All that was left was to bleed the system free of air bubbles and supply our new calipers with much needed stopping fluid. Additional corresponding upgrades are available to complete the braking system such as Speedway Motors 8” Dual Power Brake Booster/Master Cylinder Kit.
For this project we swapped out the original master/booster for a similar kit from CPP. With all the new parts properly installed, we were now ready to counteract some burnouts, that is if we could get the car to do any first, but that’s another project for a future article!