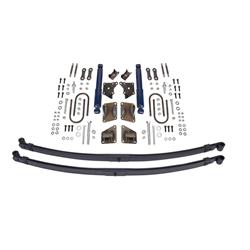
Chevy Bel Air Rear Lowering Kit
A while back, I installed the TCI Rear Leaf Spring Kit in my 1954 Chevy Bel Air along with a Gen II Camaro 10 Bolt Rear Axle. This kit states that it will lower the stance approximately 2-inches overstock. What I found out is that it actually raised the rear end of my car from where the old 1 3/4-inch wide sagging stock springs used to sit. Also, I noticed this kit moved the rear axle forward a little bit over stock.
To remedy this I turned to Speedway's Adjustable Pin Racing Leaf Spring Lowering Blocks available in 1 1/2-inch, 2-inch, 2 1/2-inch and 3-inch thickness. These blocks offer an adjustable 5/8-inch center pin with approximately 1 3/4-inches of travel.
This allows you to move the rear axle forward or backward approximately 7/8 of an inch in each direction. These blocks are used primarily in the circle track racing world to help offset the rear axle for rear steering since they turn left the majority of the time. You will want to make sure to measure from several points of the spring pad compared to the block location and measure wheel location within the wheel opening on both sides keeping them the same, otherwise, your vehicle may dog track and not drive straight down the road.
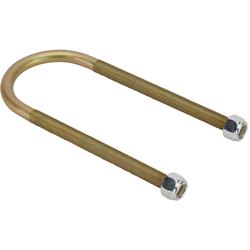
Before I even purchased the blocks, I printed a couple of black and white pictures of my car and cut the rear wheel out of the picture allowing me to locate the wheel where I wanted it on paper. I then took some measurements on the vehicle from the ground to the bottom lip of the car behind the front wheel and in front of the rear wheel and top of the wheel opening to the rim. After comparing dimensions and seeing the look I wanted on paper I chose to go with a 2-inch drop for the blocks. With this much drop, I would also need longer U-bolts as well. Speedway Motors's 8" Leaf Spring U-bolt worked perfectly with 6 inches of thread length.
To install the blocks, I had the luxury of using a hydraulic bumper jack to support the rear of my car utilizing the rear frame. You can use jack stands to support the vehicle as well, but just be sure to place them securely under the frame. This unloads the rear suspension and allows you to use a floor jack or bottle jack to support the axle on each side as you work. I removed the lower shock nut and moved the shock out of the way. Next, I removed both u-bolts holding the axle to the spring.
On my vehicle, the axle sits on top of the spring, so with everything unbolted, the axle just rests on the spring. I then used a bottle jack to jack the axle up to create space between the axle and the spring to install the block. After the axle was supported, I ended up having to drop the front of the spring down to allow me to be able to drill the center hole of the spring pad to accept the 5/8-inch center pin on the block. Mine was only 9/16-inch. With the center hole drilled out and the spring back in place, I was able to set the block between the spring and the axle and lower the axle down into place.
With the axle resting on the spring, I used a 3/4-inch wrench to turn the adjustment screw on the block to get the wheel centered in the wheel opening. Once I had it where I wanted, I installed the new u-bolts and lower shock stud, and the block was secured in place. Since I only changed the distance of where the axle sits on top of the spring, I would not need to change to a shorter shock. The shock distance and travel remained the same.
I then installed the other side the same way, making sure to measure where the wheel was in the opening and where the block was on the spring pad to keep the vehicle straight. Once I lowered the vehicle down, I was more than pleased with the new stance and where the wheel now sat in the opening.