BelAir Leaf Spring Upgrade
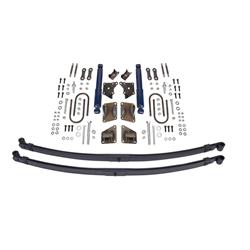
If you have a 1949 to 1954 Chevrolet car and want to convert the old torque tube rear end to an open drive, Speedway Motors sells the kit you need. I wanted to update my 54 Belair 4 door to what many old gearheads refer to as a sleeper. I had already acquired a used GM 8.5 rear axle with 3.73 gears and a posi. And I was looking for a kit to install it. The TCI kit offered by Speedway Motors (P/N 91042449) was the definite hands down choice I went with. The kit included everything needed to accomplish my goal. Updated leaf springs from stock to 2 ½”improve both the ride and handling. High-quality bolt in spring hangers, shocks and all the necessary hardware was included in the kit. So let’s get the installation started!
First off, all the old has to come out before any of the new can be installed. Luckily I had spent a good deal of time a few years ago re-finishing the undercarriage of my 54. So everything was nice and clean. After everything was unbolted and the torque tube rear was out it was time to remove the old spring hangers.
The original rivets need to have the heads ground off. Even after grinding the heads off the rivets can be hard to knock out. I ended up using a hammer and chisel to knock the hangers off the rivets first. Then the rivets popped right out of the frame. Something about trying to drive the rivets through the hangers and the frame made things difficult. This method made life a whole lot easier. Make sure you pay attention to the orientation of the hangers before removal.
The replacement spring hangers are side specific so just match them to what is already on the car. Before installing the new spring hangers I painted all the bare metal surfaces and installed them using the supplied hardware.
You will need to drill one new hole for the front brackets. I used a center punch to locate the drill bit. And started with a pilot hole and then stepped up to the correct size bit. For me, one side was easier than the other. It seemed that one frame rail had a hardened spot right where I needed to drill (9).
Once I had the hangers bolted up I installed the new leaf springs. The pressed in bushing side of the spring mounts to the front spring hanger, once in place I just let the spring hang down. I then could assemble the shackles on the rear hangers and simply lift the rear spring eye into place and bolt together.
Now I was ready to set the new rear end in place. First, some prep work had to be done on the axle housing. I removed the original spring perches from the rear end housing using a grinder to remove the welds and a hammer to knock them off. Then I set the new spring perches on the centering pin of the leaf springs and placed the rear end on top and loosely bolted the rear end to the springs using new U-bolts and plates. Now the measuring and centering begin. I centered the rear end from side to side measuring several different points on the car. Once I had the axle centered for proper wheel location I set the pinion angle using an angle finder, such as P/N 91089409. I set the pinion angle at 1 degree down. This allows for suspension load once the car is lowered to the ground. When lowered, my '54 ended up with a pinion angle of 3 degrees up. Once I had everything set, I tack welded the spring perches to the axle. Then I removed the axle one last time to finish weld the spring perches, clean everything up and give it a good coat of paint. Final installation went smoothly, as it should since I had everything mocked up. TCI's leaf spring kit made this axle swap a snap. All the parts are high quality with nice welds and detailed instructions included. I installed this kit by myself using a homemade axle jack, so it can be done by one person. However, a few times it would have been nice to have another pair of hands.