Assembling a Sprint Car Front Axle
The first step of this assembly is to mount the front axle in a vise. If you are using a used axle, you can check straightness at this point using a straight edge. Next, place a level on the top of the axle to make sure it is mounted level in the vise. Once this is done, use an Angle Finder Gauge Tool to check the degree of the kingpin bosses.
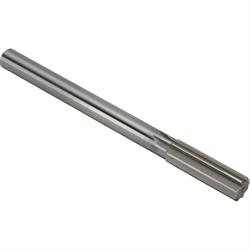
Once you have your axle mounted, you need to check the kingpins in the axle bosses. You want the kingpins to have a snug fit, but not a press fit. Do not hammer kingpins in the boss. You may need to ream the bosses with a King Pin Reamer.
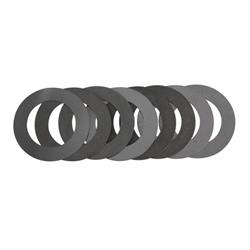
Once the kingpins fit, you can check them for fit in the spindle using the same method. Again, you want a snug fit, not a press fit. At this point, you are ready to assemble spindles to the axle. Make sure to mount spindles with ears to the top of the axle. The torsional bearings go on the bottom of the axle in between axle and kingpin. Once again, this should be a snug fit. If not, you may need to add some King Pin Shims with the torsional bearing and spacers.
Grease the kingpin, axle boss, and spindle bushings, then align spindle to axle boss and push kingpin from the top of the spindle through spindle into the axle. Align the torsional bearing and shims in between the bottom of the axle and kingpin then push kingpin through the rest of the way. You can now attach the kingpin cap.
Next, you can bolt on the steering arms. The combination arm goes on the left front side. Using flat head countersunk bolts, put them through the brake bracket, through the spindle, and thread into combo arm. Test fit bolt length to make sure bolts do not bottom out in the arm. Bolt the standard arm to the right spindle using hex head bolts. I recommend using a few drops of blue Loctite on bolt threads. Do not use red Loctite, as this can damage threads when disassembling.
The next step is to bolt the brake rotor to the left side hub. Use three ½-20 flat head countersunk bolts to do this. Apply a couple of drops of red Loctite to the bolts. You will then need to grease the wheel bearing making sure you work the grease inside the bearing, not just applying to the outside. Place a thin coat of grease on the bearing race inside the hub. Place the inner bearing in the hub and insert the hub seal. Make sure to drive the seal in straight, as you do not bend or damage the seal. Do this for both hubs.
Once this is done, you can install hubs on spindles making sure the hub with the rotor is placed on the left spindle. Slide the outer bearings over spindle snout into place. Install the spindle nut washer first, then spindle nut. Tighten until the hub does not spin freely, and tighten the back nut an eighth to a quarter turn until the hub only slightly drags. Align the socket head bolts, and screw into the spindle nut washer. Now, screw on the hub cap to each side.
The final step is to attach the tie rod. You may need to run a [Tap] (https://www.speedwaymotors.com/Industrial-Tap-5-8-Inch-18-SAE,32086.html?OriginalQuery=91281036) in the threads so the rod ends screw in easily. Place jam nuts on rod ends and thread into tie rod. Using ½-20 hex bolts attach to steering arms on the bottom side. Place the cone spacer in between rod end and bottom of the steering arm.
Once the front end is installed in your car, you can attach brake caliper along with brake line guard using 3/8-16 hex bolts.


