Alternator Bracket Install on a 454 Big Block Chevy
It's amazing how simple little things like an alternator can create headaches when building any kind of car. I don't have an engineering degree, no fancy credentials, just trial and error for me. After all its call Hot Rodding for a reason and life experience is the best teacher in the world.
I had a problem that needed attention in regards to the placement of my alternator. What I have is a 454 Big Block Chevy with a Speedway Motors Short Aluminum Water Pump, part number 91015588. It is critical to know short vs. long water pump when choosing brackets. The easiest way to tell for sure is to measure. For Big Block Chevy's a short water pump measures 5 ¾” from block mating surface to fan mating surface on the water pump. Long water pumps measure 7 ¼” inches. Long pumps mount the alternator on stock applications on the passenger side, short water pumps on the driver’s side. Depending on the water pump you have, the brackets will be different.
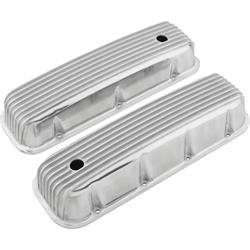
Back to my dilemma, I also installed a pair of Speedway Motors Tall Aluminum Finned Valve Covers, part number 91017119. Since I was using a stock alternator bracket that located the alternator outboard of the valve cover, I ran out of adjustment for a belt. I couldn't go with a shorter belt because the alternator body hit the valve cover and I was out of adjustment length to get the belt tight enough so it wouldn't slip.
The solution I came up with is Speedway's part number 91667924, Bill's Hot Rod Company Big Block Chevy Alternator Bracket. This bracket re-locates the alternator to the inboard side of the valve cover just above the water pump on the driver’s side. This allows plenty of belt adjustment and clearance for my cool tall finned valve covers. Detailed instructions are provided in the box and are available in a printable PDF file at Speedwaymotors.com.
Before removing any bolts you will need to drain the coolant first. The new bracket uses the top two water pump bolts and front intake manifold bolts. Those bolt holes on an early Chevy motor are not blind be it a big block or small block. Meaning, they go into the water jacket, so if you remove one, your coolant will come gushing out. While my radiator is draining I can remove the alternator and old brackets.
After disconnecting the battery to avoid any sparks I unbolted the alternator and brackets from the engine. Pretty straight forward, two bolts for the alternator, unplug the DA plug and remove the positive wire from the back of the body. The old bracket is bolted to the front of the head with two bolts and above the number one exhaust port with one bolt for the lower support.
The upper swing arm is bolted to the top water pump bolt and one bolt going into a boss on the front of the intake manifold. With all the old removed it was time to install the new setup. The new bracket comes with all the necessary hardware including enough spacers for proper alignment. I bolted the main body of the bracket to the top two water pump bolt holes using the supplied 1/4" Allen head bolts.
There were three washers to stack behind the bracket to space it out to the desired 1 3/4" from the block. Upon measuring after installation my setup only required two washers. So I unbolted the two water pump bolts, removed one washer from each side, applied some thread sealer since the bolts go into the water jacket, and re-tightened the bolts.
The bottom alternator support bracket bolts to the main body of the base bracket and utilizes the front intake manifold bolt. I used the supplied 1/4" Allen head bolt for this along with the 6 washers under the intake side of the bracket to achieve the 3/4" space needed between the bracket and cylinder head. Also make sure to use using a Non-Hardening Thread Sealant like ARP part number 1011009904 on any bolts going into the water jackets.
Then I torqued the bolt to 25 ft.-lbs. Next was to install the alternator, snag number 2 for me. The alternator I had on previously had a 7" on center dimension between the two bolt holes. So the c-clamp that hooks under the bottom alternator boss around the body of the alternator and bolts to the top bolt wouldn't fit. This bracket requires the smaller 6 5/8" bolt center, which is from 70's-80's GM cars. Luckily I had a couple good used alternators on the shelf so with a little cleanup and pulley/fan swap I was back in business.
After mounting the alternator I installed a Gates v-belt from my local parts store. I used the shorter 7516 belt that was recommended per the instructions. After belt adjustment I attached the wires for the alternator, filled the coolant back up and was back on the road with a nice tight belt that didn't flop, wobble or slip. This bracket solved the issues I had before and is available in raw, black powder coated or chrome finish. And for you A/C guys, there is a matching A/C bracket for the passenger side!