The Day We Became Brake Masters
A wise co-worker told me recently, “If everything goes right, you don’t learn anything.” Well, we learned A LOT about brake lines this week. Here’s the quick overview… One – You will need more brake fluid than you think. Two – It will take waaaay more time than you’ve planned. Here’s all the details… #tinyT is a pro at assembling the front calipers and brake pads. She’s only had to do it a hundred times by now. Our calipers fit very close to the flat steering arms, leaving limited room for our brake line fitting. In order to hook up the braided brake line to the caliper, she used a special brake adapter fitting (617-2061). A jam nut acts as a lock and lets you clock the 90 degree fitting in a direction towards the brake line. It’s a great solution if you need full adjustment options in a limited space.
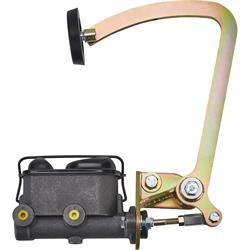
Our stainless steel brake lines came pre-bent in a kit and included a proportioning valve, a residual pressure valve, a brake pressure switch and all the fittings. We triple-checked the fittings to make sure there were no obvious issues, but we’d only really know of a problem once we added brake fluid.
Ah, brake fluid. I grew up listening to safety lectures from my dad about how dangerous brake fluid can be. The DOT 3 version will strip paint and blind ya pretty quick. We chose DOT 5, a synthetic brake fluid – it’ll be nicer on our painted parts. Also for the ‘good-to-know’ file, brake fluid is hygroscopic, aka water-loving. Once you open a bottle, it’ll slowly absorb moisture from the air. Water acts differently than brake fluid and will affect the functionality of the brake system. So keep your cap tight and date open bottles so you know how old they are.
Time for fluid: #TinyT added fluid, pumped the brake pedal and watched the fluid levels in the master cylinder drop. Since these were dry lines, it took A LOT of fluid. She kept the M/C topped off with fluid throughout the entire process… an empty M/C will pump more air into the lines. We watched all our fittings closely for signs of leaks. Blue shop paper towels were handy – they turned a darker blue when wet, so it was much easier to pinpoint a problem. We ended up tightening the banjo fittings on both rear brake calipers, and replaced a front brake line which had a broken flare (thanks to our friend Joe for bending and flaring it for us). Eventually, it looked like all the lines and fittings were good to go.
Time to bleed the brakes: We started with the rear passenger caliper, which is the farthest from the master cylinder. After many, many, many pumps, #TinyT’s tired arms held the pedal down, while I turned the bleeder valve open letting out a hiss of air and a bunch of fluid. Then I turned the bleeder valve shut and #TinyT let off the pedal. A few more pumps of the pedal, hold it down, open the valve, hiss of air with fluid, shut the valve, let off the pedal. And repeat. Then the same for the driver side rear caliper, then the passenger front caliper, then driver side front caliper.
Joe, our friend and lifeline in engineering, brought us a specially made (and well-used) catch bottle to keep the brake fluid from splooshing everywhere. A simple plastic bottle with a plastic line that fit over the bleeder valve. It even had a magnet attached so it could rest by itself. It also gave us the ability to see what size bubbles were being bled out of the line.
Our rear calipers ended up being a little trickier than we expected. Since our bleeder valve is lower than the reservoir (in the back of the caliper) we most likely had air trapped at the top of the caliper. We took the calipers off the rotors, rotated those suckers so the bleeder was the highest point and started the bleeding process for the rear again. Then reattached the calipers to the rear rotors. During this process we discovered that our fixed rear break lines were not going to work. We had to bend the line to attach it to the calipers and they continued to leak. We decided that flexible brake lines would work much better! So we had 2 (36” brake line – 91031846-3) pulled. What we didn’t realize is that the adapter we had with the old lines wouldn’t fit our new lines. So we finished with two new brake lines, a new adapter, and no leaks!