Replacing Sway Bars in a Mercury Comet
In my never-ending attempt to get my Comet to handle properly, I’ve replaced the steering components, the suspension with new springs, and shocks front and rear. While it has made a very noticeable difference, I’m still not satisfied. So, I went to what is likely the last thing I had available to modify, and that was the sway bars.
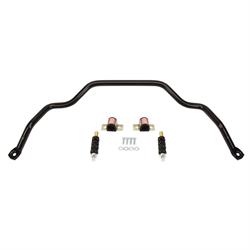
Now, surprisingly there was a large selection for the early style Falcons and Comets, and both front and rear options are available. I decided to try and achieve the most force possible and jumped straight to the top. I chose the 1 1/8" Front Sway Bar Kit and ¾" Rear Sway Bar Kit. These cars never came with a rear sway bar, so adding just about anything would likely make a huge difference.
The front installation is a dead simple, remove and reinstall, not too complicated. I have found it is easiest to take the bushings and frame brackets, barely get the bolts threaded in holding everything in place, then install the sway bar links and tighten everything up. The sway bar links are shorter than stock and the bushings are thicker at the bottom than stock, too. This helps keep everything from contacting any components.
As I started to tighten things up, I noticed that the sway bar was coming awfully close to the oil pan to the point where I couldn’t squeeze my finger behind it anymore. However, after grabbing the flashlight I could see there was still a small gap between the pan and the bar, so it barely fit. After setting the car back on the ground, I checked again and there was much more room now. I drove the car after replacing the sway bar just to see how it felt and there was a big difference. The body roll was greatly reduced.
I then started the installation of the rear sway bar. Now, there are instructions included to guide you to install these units. It’s a pretty basic kit, a little bit of drilling is needed, but everything else is strictly bolt-on. I would like to preface this by saying that the kit is designed for the 3-inch diameter rear axle housings like the 8” or 9” Fords common have with the V8 powered cars.
Since my car was a 6 powered unit, it had the smaller 2-¾ inch diameter housing, which makes the axle bracket sit slightly lower on the axle, but otherwise is not affected. This kit utilizes a bracket that looks like a C bent from 3/16 steel and looks as though they didn’t quite get the bends to 90 degrees. This was done on purpose to create a wedge or interference fit on the housing with the bracket to keep it from rotating or moving. This is held down by a pair of U-bolts just like you would use for your leaf springs.
There is a hump in the sway bar to fit over your third member so if you do wish to install this kit the rear end will have to fit like the original with the offset housing for the sway bar to work properly. I would start in a similar fashion to the front loosely, installing the brackets that mount to the rear axle. The upper mount to the frame or in my case subframe was as simple as drill the 2 holes insert the square U-bolt and bolt the bracket on. I did spend a little bit of time elongating the holes slightly to make the bolts fit properly.
Now, you can assemble the end links before installing the frame bracket, it will sit at an angle along with the sway bar itself. This isn’t going to hurt anything as it's still translating the torsion from one side to the other. After double checking that everything was secure, I once again test drove the car and what a difference it makes the car take corners so much better its unreal. I need new seats to fully take advantage of the cars new handling, bench seats aren’t exactly known for good bolstering. The only thing left for me would be to install subframe connectors and this car should handle like something decades newer greatly improving the driving experience.
