Installing a Custom Exhaust System: Part 1 - 1967 Chevelle
I’ll admit that exhaust is not my favorite thing to work on. Most of the time it’s nasty and crusty. Nothing comes loose without heat or cutting and you’re inevitably going to end up with a bunch of it in your face. I’ve never seen anything get around safety glasses like exhaust scale. All new pipe on an all-new car is a different story.
I’ll also admit that I’m probably the second-cheapest person you’ll ever meet. The first is my wife, who thinks I’m nuts for what I’ve spent on this car. Ultimately, this was the factor that determined my decision to tackle my own exhaust system on the Chevelle.
The prospect of taking the car to an exhaust shop only to be disappointed with some aspect of how it was done, plus paying close to $1,000 for the privilege did not excite me. Did I mention that I’m probably also the pickiest cheap-skate you’ll ever meet?
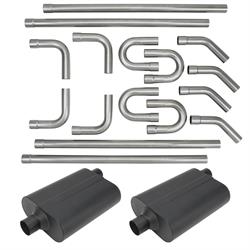
That didn’t leave me very many options when it finally came time to get exhaust work finished. I started with a solid foundation in the DIY 3-inch mild steel kit purchased from Speedway Motors. It comes with an assortment of bends and four sticks of straight pipe. Each part is expanded on one end to allow clamped connections.
I prefer a smoother, fully welded joint.
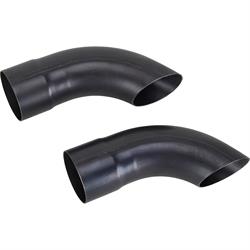
My main goal was to get the full 3-inch exhaust tucked as close to the floor as possible to aid with ground clearance. I also didn’t want any of the exhaust visible except the dump turndowns and tailpipe tips. That all starts with the headers. I chose mid-length Hedman headers for their abbreviated reach under the car and their ball and socket style collector flange.
From the collector/reducer supplied with the headers, I went to work routing small sections of pipe and tacking them in place as I got things figured out.
I had a loose plan going in but hadn’t 100% decided on a path for the tubing until I was under the car and could test fit things. The next obstacle in the path was the transmission cross-member. Which if you recall, got swapped out for a G-Force unit. I used that cross-member for this exact reason. It can almost accept the whole depth of a 3-inch pipe.
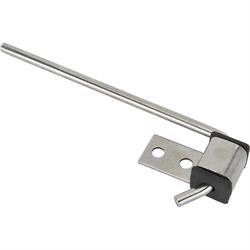
As it turned out, my bigger obstacle in that part of the floor was the body brace that I’d attached the driveshaft loop to. As it worked out, the bolt spacing on the exhaust hanger was exactly the same as the bolts/holes for the driveshaft loop. So, while a little lower than I’d wanted, that happy accident more than made up for it. It made for a clean and (at least what appears) intentional dual-purpose mount.
From there, I needed to do two things. I needed the pipe to move inboard toward the driveshaft tunnel to increase ground clearance (because the rear seat footwell hangs down) and I wanted to incorporate cutouts before the mufflers.
Since the stretch of exhaust next to the drive shaft appeared to be the only place left that there would be a straight pipe, that’s where I landed the cutout.
From there the path needed to go up and outboard slightly to mate with the muffler, which I had suspended in place with a jack. Using a trick I used to use for mocking up motorcycle fenders, I taped a loop of 5/8” heater hose to the top of the muffler in order to maintain an airgap between the exhaust and the floor.
I guess I didn’t mention it earlier but never let the pipe or mufflers actually touch anything on the bottom of the car. Only the hangers should make contact. The rubber in them isolates vibration and helps insulate against heat transfer. Modern heat and sound insulations like Lizardskin work well, but why not try to make their job easier?
Most mufflers are fairly heavy. Thicker material and full welds make Speedway Motors chambered mufflers heavier than most. I highly suggest at least one hanger at the muffler. It’s hard to see in the second picture, but I put mine at the rear, outboard side, and secured it to the cross brace in the floor ahead of the rear end.
Time for a break. I know on a lot of street machines, this is where the exhaust is finished. A pair of turndowns ahead of the axle and you’re good to go. I’ve driven cars many miles with that very setup. I’m older now, and while I still love the sound of a lot of cubes through a deep and authoritative system, I like it a lot less inside the car than I used to.
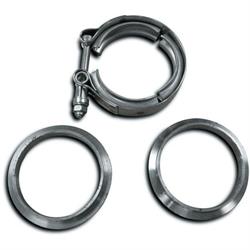
V-Band clamps and tailpipes. This was the place in the system where I left myself an escape route. If I was tired of messing with it I could weld the other half of the clamp flange to a turn-down and call it done. Even though that’s not what I really preferred. I was also a little uncertain that I’d be able to snake 3” pipe over the rear axle and get it to exit in the stock location like I’d wanted.
So this article is a bit of a cliff (exhaust) hanger. Check out the next installment to see if I was stubborn enough to make tailpipes or not.