Installing a Crankcase Ventilation System
After changing the engine in my ’69 C/10 to a 406 with Vortec heads, I was looking for a crankcase vent system that would fit in properly with the factory Corvette center bolt valve covers that were on it. The aftermarket look of metal dome style or K&N style filters just wasn’t working for me on this one. Also, I did not want to run a PCV system due to the marginal vacuum of this engine from a large camshaft.
What I decided on was using two Valve Cover Elbows along with some ¾” ID Hose. With those items, I started brainstorming where to route the hoses to keep a clean look under the hood. What I came up with is connecting both sides together then running one hose up to the air cleaner. My air cleaner did not have any way to connect the hose, so that was going to be a hurdle to jump as well.
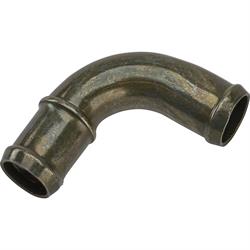
When scouring through my scrap tubing pile, I found some thin wall ¾” OD tubing that was leftover from some other project years ago. It was just what I needed to fab up a T connector. With the placement, I was after for the T connector it needed a little less than a 90-degree bend. With some careful bending, heating, pie cutting, and welding, I was able to create just the piece I needed. (This would have been a lot easier if I had a tubing bender!) Then, all that was left to finish off my T connector is drill a hole in the top and weld a straight piece of tubing on. The tubing on top will point straight up toward the air cleaner base. After welding, I cleaned up the inside of the tube with a carbide burr. This will ensure an easy airflow path and keep crankcase pressure to a minimum.
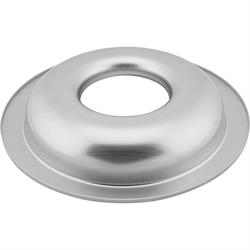
To connect the ¾” hose to the air cleaner base, I drilled a hole in the base and used a Valve Cover Grommet. When drilling the hole, I suggest making it slightly smaller than 1 ¼” to keep a tight fit on the grommet. The area I was drilling into the air cleaner base is curved and caused a very loose fit when drilled to 1 ¼” with a step style drill bit. The air cleaner base I used is the 14 inch Sure Seal Air Cleaner Base and is also included in the complete Sure Seal Air Cleaner Assembly.
With the hole drilled in the air cleaner base and grommet installed all that was left is fabricate an elbow to insert into the grommet and point straight down. Again I didn’t have a tubing bender so for this one I made two angle cuts of the ¾” tubing on my chop saw and welded it together.
Now that all of the welding a fab work was complete, I put a coat of satin black paint on the T and air cleaner elbow. Once the paint was dry, all that was left is assembly. I used a Hose Cutting Tool to make nice clean perpendicular cuts. After all, why go through all this work to make a clean looking installation and have a hacked up hose?
The hose was a tight enough fit at each connection that I don’t see it necessary to use clamps, which again makes this look much cleaner. All in all, I am very happy with this crankcase vent setup. It looks nice and vents well. One other plus side that I wasn’t expecting is now I don’t notice any crankcase vapor smell when the engine is running.