Install Guide: Upgrading a 5.3 LS With a Cam Swap
Camming a 5.3 | LS Cam Swap Overview
5.3 LS engines have huge power potential just waiting to be unlocked. One of the most common 5.3 LS horsepower upgrades is a camming a 5.3. We’re doing just that on the junkyard LM7 5.3 that we’re planning to use in our ’68 C10 project. The above video shows what a 5.3 LM7 cam upgrade looks like and a few things to look out for when performing a 5.3 cam upgrade.
As for the 5.3 LS engine cam itself, we chose a BTR "Truck Norris" cam. Of the many choices of LS camshafts, this cam is designed to work well in street-driven 5.3 and 6.0 truck engines and is a great option for camming a 5.3 Vortec engine. BTR recommends a torque converter stall of at least 2,400 rpm and the obvious upgrades to the LS valve springs and a LS trunnion upgrade install as well. Some work to the ECM will also be required when running a 5.3 Vortec with a cam (or the 6.0 for that matter). In our case, we chose to start from scratch with a Holley Terminator X EFI system to provide full custom tuning ability from the get go.
5.3 LS Cam Swap Without Removing Heads
In short, it can be done, but we didn’t do it. Upon inspection after disassembling the valvetrain on our 130,000 mile engine, we discovered some wear on the pushrod tips and the rocker arms that was likely caused by failing lifters. We elected to pull the heads and do the job right to rectify the situation, which is a wise choice when doing a 5.3 cam swap to a high mileage LS engine. We're only talking a little more time and labor and a new LS head gasket pair. However, if these components on your LS pass a careful inspection, then it’s entirely possible to complete a cam swap without pulling the heads.
LS Cam Swap Dowel Rods For Lifter Support
When performing a cam swap on an LS engine without removing the heads, one of the main challenges is keeping the lifters from falling into the camshaft area once the cam is removed. LS engines use hydraulic roller lifters that ride in plastic trays, and while the trays offer some retention, it's not enough to trust during a cam swap; especially in a higher mileage engine.
A popular trick is to make your own LS cam swap tools out of some sort of wooden or metal dowel rods. Here's where these LS cam swap dowel rods come into play for a LS 5.3 cam upgrade (or any LS cam swap really). These dowel rods act as a shade tree LS cam swap lifter tool by inserting them into the oil galleries as shown in the photo below. Sure, we could have just flipped the engine upside down to hold the lifters up off of the camshaft, but you can’t really do that if the engine is still in the car. So, we elected to show what it looks like to do this right side up. Spin the cam over with the rockers removed and the lifters should stay up thanks to their friction fit in the LS lifter trays, allowing 5/16-inch dowel rods to be inserted in the oil passages. This holds the lifters up off the camshaft and allows the old cam to be removed and the new one installed, making quick work of this 5.3 LS cam upgrade. If your build involves deleting Active Fuel Management (AFM) then there's no need for the dowel trick, as you'll be pulling the heads to replace the lifters with a compatible LS AFM delete kit.
Do You Have to Degree a Cam in an LS Motor?
No, you do not have to degree your camshaft for most applications. Having an LS cam degree tool is an additional cost for what will be a one time use for most enthusiasts. As such, providing you are using high quality components for your LS camshaft, timing chain and gears, and so on you can skip degreeing your camshaft. For the typical street driven 5.3 LS cam upgrade like we're doing here, using the "dot to dot" method of lining the cam and crank "straight up" is going to get the job done without any additional steps or using a mult-index timing chain setup, which can add confusion. For a max effort build with a custom grind cam, definitely, you want to verify TDC, piston to valve clearance, and degree your camshaft, but for "off the shelf" cams in most street applications it is not required. This is especially important if mixing different valvetrain brands.
5.3 LS Valve Spring Upgrade
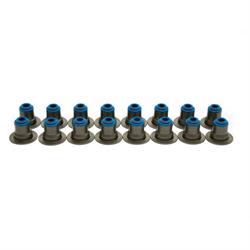
Regardless of whether you pull the heads or not, you’re going to want to upgrade the stock valve springs as well. The stock valve springs are not designed to handle the added stress of a higher lift cam and elevated engine speeds, which can result in valve float and power loss at high RPM. We used a set of PAC beehives that will allow our LS to take full advantage of the cam and the engine's improved rpm potential. While we were at it, we also replaced the valve seals.
Here’s where another handy tool comes in. A stud mount valve spring compressor or pedestal mount version for stock style heads, allows the springs to be compressed while the heads are installed. Don’t forget to fill the cylinder with compressed air to keep the valves from dropping.
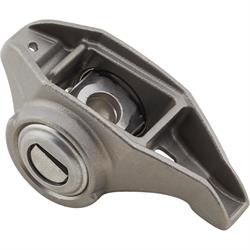
For mild cam swaps, a quality set of performance valve springs paired with upgraded LS rocker arms is a solid combination. When increasing spring pressure significantly, it's also a good idea to replace the LS cam bearings to maintain proper oiling and durability. A dedicated LS cam bearing tool makes installation precise and hassle-free.
5.3 Trunnion Upgrade Install
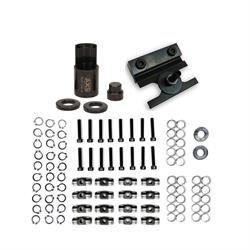
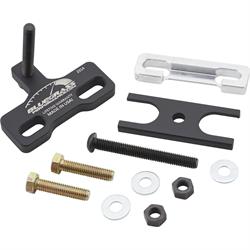
5.3’s and many other Gen III engines have issues with the stock rocker arm trunnions (the pivot within the rocker arm) when a running a cam with much more than stock lift. The solution is a trunnion upgrade kit, such as the BTR V2 Trunnion Kit, which is one of the best LS rocker trunnion upgrade options. A special LS trunnion tool is required for installation. Speedway Motors also offers a nice trunnion upgrade kit that comes with everything you’ll need, including the tools for install.
LS trunnion upgrade benefits include higher quality bearings that can support the more aggressive lift and duration of performance camshafts while reusing the stock rocker arm bodies. It is an important, yet money saving upgrade versus going with a full aftermarket rocker arm solution. Aftermarket trunnion upgrades also reduce LS rocker arm noise and LS rocker arm failure chances. You're having to perform LS rocker arm removal anyway (to remove the pushrods and allow the lifters to be pushed up for the cam swap) so why not handle the trunnion upgrades at the same time versus doing the work a second time down the road? This way when you're ready for final LS rocker arm installation you're good to go with "one and done" assembly.
5.3 LS Cam Swap Tools
Basic Tools for Any 5.3 Cam Swap:
- Balancer removal/installation tool
- Torque wrench (for LS rocker arm torque specs, valve cover bolts, and other fasteners)
- Camshaft degree tool (optional as stated previously, but helpful for dialing in performance cams in high horsepower builds)
Extra Tools If You're NOT Removing Cylinder Heads:
- LS cam swap dowel rods to hold the lifters up in their trays while the cam is removed
- Flexible magnet or telescoping magnet tool to help reposition lifters if one drops slightly
- LS cam swap lifter tool (optional, but adds confidence)
- Compressed air with spark plug adapter to pressurize cylinders with air and hold valves closed
- Valve spring compressor for easy spring swaps if your cam requires upgraded springs
Tools Needed If Cylinder Heads ARE Removed:
- Feeler gauge for checking lash (if needed)
- Pushrod length checker (recommended if changing rocker geometry)
- Gasket scraper, and cleaning supplies – keep surfaces clean for reassembly
- Torque angle gauge for LS head bolt torque procedure or digital torque wrench with torque angle abilities
LS Rocker Arm Torque Specs & Install
When installing rocker arms during a 5.3 cam swap or LS trunnion upgrade install you must know how to adjust LS rocker arms. Getting the LS rocker arm torque specs and sequence right is critical for proper valvetrain function and reliability. There is a specific LS rocker arm torque procedure you must follow.
LS Rocker Arm Torque Specs (Always use a quality torque wrench and verify thread cleanliness to avoid false readings):
- 1997-2004 Gen III LS: 22 ft-lbs (30 Nm), preferred torque in two steps of 11 ft-lbs and then 22 ft-lbs
- 2005-2020 Gen IV LS: 22 ft-lbs (30 Nm), torqued in a single pass
LS Rocker Arm Torque Procedure:
- When torqueing LS rocker arms, it is important to ensure the valve is fully closed. This helps prevent improper preload on the lifters.
- The engine should be rotated so that the cylinder being worked on is at top dead center on the compression stroke via the LS rocker arm sequence shown below. Both the intake and exhaust valves should be closed.
- There is no need to follow the firing order. The installer should rotate the engine and torque each rocker arm to the indicated LS rocker arm torque only when the corresponding valve is fully closed.
- Since LS rocker arms use a pedestal mount bolt and are not adjustable, the main goal is to avoid incorrect ls rocker arm bolt torque when the valve is partially open.
Other Essential LS Cam Swap Torque Specs:
Camshaft Retainer Plate Bolts
- 18 ft-lbs (Note: Use thread locker like Loctite Blue)
Camshaft Sprocket Bolts
- Gen III: 26 ft-lbs
- Gen IV (torque-to-yield): 26 ft-lbs + 50 degree torque angle (Use new bolts for Gen IV or when specified)
Timing Cover Bolts
- 10mm Bolts: 18 ft-lbs
- 6mm Bolts (if used): 106 in-lbs (about 9 ft-lbs)
Crankshaft Balancer Bolt
- Initial Pass: 37 ft-lbs
- Final Pass: +140 degree turn (torque-to-yield, always use a new balancer bolt)
Water Pump Bolts
- 22 ft-lbs (torque in a crisscross pattern)
Valve Covers
- 106 in-lbs (approx. 9 ft-lbs)
LS Head Removal and Reassembly
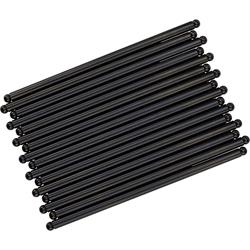
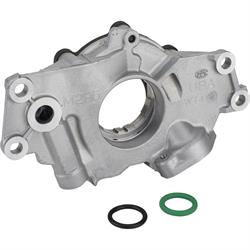
As we alluded to, we elected to pull the heads on our engine to replace the lifters. We used our LS7 Lifter Kit (don’t forget to order two sets of 8) and new lifter trays. We also installed a new set of pushrods and a few new rocker arms to replace those that were damaged. While the heads were off, Zach took them over to Speedway Motors Racing Engines and surfaced them. This is recommended any time you pull the heads, and Zach went one step further on ours and lapped in the stock valves. Don’t forget that these engines use torque-to-yield bolts, so a new set of head bolts will be required, along with new head gaskets. Also on the "you don't have to but you should anyway" list is a new timing set as well as a new oil pump.
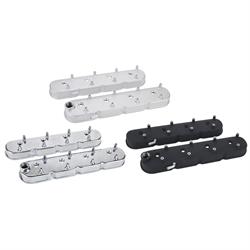
With everything re-assembled, our engine was buttoned up with new valve covers and the stock intake. Be sure to check out our C10 Build Episode 4 to hear it scream on the dyno. Spoiler alert: we made 430 horsepower! Could a LS turbo kit be in our C10's future? Maybe!
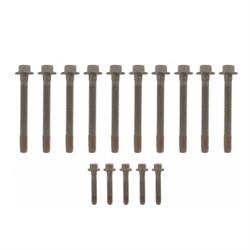
Can You Reuse Head Bolts on a 5.3?
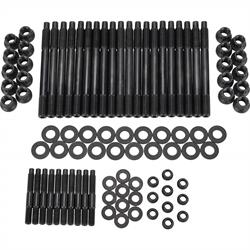
The factory head bolts that GM uses on the LS engine family are torque-to-yield style bolts (TTY). We're often asked "Can I reuse head bolts?" and the answer will always be NO for any TTY application. These bolts use a special tightening sequence combination of torque and angle of degrees to properly stretch the bolt. When a TTY bolt is tightened in this fashion it is stretched beyond its elastic limit and is permanently deformed. This may sound bad, but it provides a superior clamping force evenly across the surface. The down side is, since the bolts have been stretched to a deformed state, they are one-time-use fasteners. Often, you will find that if you try to reuse the TTY head bolts you will usually break them during the torque sequence, or you will not provide enough clamping pressure, which will result in a head gasket failure and possible engine damage. As such, stock TTY bolts (whatever the application/placement may be) should NOT be reused. If you're planning to perform major upgrades/maintenance in the future, we recommend upgrading to aftermarket fasteners that are not TTY bolts, such as ARP bolts or studs.
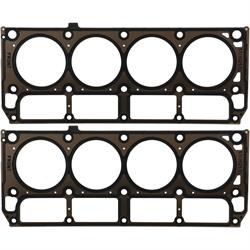
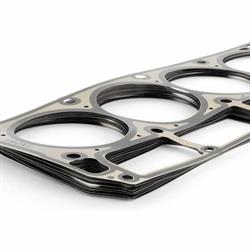
Can You Reuse MLS Head Gaskets?
Almost as popular as asking "Can you reuse LS head bolts?" is asking the same question about the LS engine's factory multi-layer steel (MLS) head gaskets. The answer is usually a flat out no, but some will caution a "maybe" response. In general terms, if you're doing dyno testing and will be swapping heads off and on, or just dry fitting the heads to check piston-to-valve clearance, and so forth, you should be fine. However, for long term sealing and many miles/years of happy driving, it is best to spend the the extra money on a new pair of MLS gaskets. While the MLS gasket layers are better at sealing than a traditional head gasket design, the MLS design still utilizes raised sealing surfaces that are compressed when the head is torqued to the manufacturer specifications, reducing the gasket's ability to seal a second or third time. It will always be a gamble to reuse a MLS head gasket and our vote is for the extra reassurance a new set of MLS head gaskets will give to your build.
Looking for more guidance on performance and power levels? Check out our 5.3 LS and 6.0 LS hp guides for cam and spring combinations that match your performance goals.
Updated by Mark Houlahan
Technical content assistance provided by Jerad Flemming