How to Weld a Differential | Welded Diff vs Open Diff | Lincoln Locker Pros & Cons
First, this is not a modification that should ever be made to a street-driven vehicle. That is the most important thing you should come away with after reading this article. We want to start here because it is dangerous to drive a vehicle on the street with a welded diff or a spool, but more on that later. You may be asking “what exactly is a welded differential” or “what is a Lincoln Locker?” The answer is simple, a “Lincoln Locker” is an open (non-Limited Slip “LSD”) differential with welded spider gears. The name “Lincoln Locker” comes from the Lincoln brand of welders, as a welder is required to weld the differential gears to one another. So, what does that even mean? Let’s break it down.
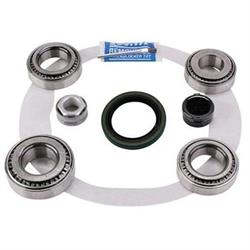
What Is the Anatomy of a Differential?
Since this article is focused on welded diffs, we’ll only need to discuss open diff style units. This is the most common “base model” diff used in older RWD vehicles. Open differentials are comprised of the following components:
- Housing or case: This carries the gears, this is the main unit.
- Side gears: These are the gears that are connected to the axles.
- Pinion or spider gears: These are the gears that ride on the side gears, allowing the differential rotation action.
- Center or cross pin: This pin performs several functions, as it runs through the pinion gears. This is the shaft that the pinion gears spin on. Additionally, the cross pin keeps the axles from sliding inward, locking them in place.
- Differential carrier bearings: Allows the carrier to rotate in the case.
- Ring gear: Part of the main gear set, bolts to the carrier.
How Does An Open Differential Work?
When the vehicle is driving straight, both tires are rotating at the same rate. This means that the force on the differential side gears is the same. In this instance, the pinion gears do not spin, so the power is transferred equally to both wheels. As the vehicle enters a corner or curve, the loads begin to vary as the outside tire must roll further than the inside tire. The differential spider gears spin to allow smooth turning without any noise or tire chirping. For most vehicles, this is simply fine and rarely presents a problem, until you find yourself on a slippery surface such as snow, ice, or mud. When an open differential sees low traction, it simply allows the slipping tire to spin. If the other tire has a good grip, it won’t matter. The only tire that moves is the one that is slipping.
In performance applications, the open differential is not particularly useful. Just like when the vehicle encounters a slippery, low-traction surface, punching the gas pedal can quickly overload the traction capabilities of the tires, resulting in spinning one tire down the road, earning the open carrier names like “one-tire fryer” or a “peg-leg.”
How Does A Welded Diff Work?
A welded diff, often referred to as a “Lincoln Locker,” has the spider gear welded to each other, so they cannot rotate, essentially locking the two axles in sync like a spool. Once welded, the carrier is not actually a differential anymore, as there is no differential rotation between the two axles. In a straight line, both wheels spin at the same rate, so you get maximum straight-line traction. In turns and curves, both wheels still spin at the same rate. This can be troublesome, as the inside tire needs to rotate slower (and travel less distance) than the outside tire. The results are unruly handling at best, as the rear wheels try to push the vehicle through the turn, as it would when going straight ahead. You can easily spin out or get pushed into a curb at higher speeds. At low speeds, a welded diff causes lots of tire squeal and wears out your tires faster.
Why Would You Weld a Differential?
Which brings us to the pros and cons of a welded diff. There are legitimate uses for doing this, the biggest one is budget, but WHY do it? Here is a list of pros:
- Budget: If you are on a tight budget and can’t/don’t want to buy a spool for your application and need a solid locked drive.
- Unavailable Parts: There are MANY applications for which there simply are no other options. Case in point, 1990s Lexus SC-series cars (SC300/400). These are the same platform as the Supra, which has a factory LSD diff, but that diff does not fit the factory housing in the SC cars, even though it is nearly identical. You could swap housings, but that is ridiculously expensive. These SC cars are extremely popular for drifting, where a welded diff is a suitable option.
Is A Welded Diff Good For Racing?
- Off-Road/Track Use: For budget drag racing, drifting, and rock-crawlers, a Lincoln Locker is perfectly acceptable, provided the vehicle is not used on public streets. The biggest advantage of a welded diff is that it acts like a spool, giving you perfectly consistent drive from both rear tires. This is what you want in drag racing. LSDs can spin the tires unevenly when the clutches are worn. Lockers are much more expensive, putting them out of the price range for many beginners.
- For drifting: The unavailability of differentials for many models used for drifting makes the Lincoln Locker a popular choice. You get consistent tire spin, so once you learn the car, it doesn’t really change. An LSD isn’t inherently consistent; they can behave in odd ways at times. A spool or welded diff will always spin the tires in the same way, so you have more control and consistency for managing the oversteer in a drift.
Welded Diff Problems And Risks
The biggest issue with a welded diff is the same as a spool, the drive wheels are locked together and cannot spin at different rates, which is required for turning. At low speeds, the tires will chirp and squeal, which is not terrible, but wears out your tires and brings a lot of attention to you, so don’t do anything dumb! At higher speeds, the rear wheels can push the vehicle through the turn, as in push you straight into the other lane or to the curb.
With enough speed or aggressive throttle, you can easily lose control if the tires break traction and then grab, snapping the vehicle around. A welded differential is very unpredictable in turns and curves. While you can simply slow down for turns and deal with chirping and squealing, at highway speeds on a curvy road, the vehicle can be extremely dangerous.
How Long Does A Welded Diff Last?
A welded diff can be quite durable if it is done well, or it can blow apart at the worst possible moment, putting you and your vehicle in serious danger. This is another major concern with welded differentials, you really don’t know if it will hold. If you get excellent penetration on the welds, and the gears were cleaned properly, a welded diff can last a long time, and they will take serious horsepower and torque.
A welded diff can put more stress on the other components, including the axles, bearings, and gears. These components, especially axles, can break with catastrophic effects, so make sure your components are in decent shape and capable of handling the power you are sending through them.
Is A Welded Diff Legal?
If you are to use it on the street, you need to check with your local laws. Again, we do not recommend using a welded diff on the street.
What Are The Alternatives To A Welded Diff? | Locker, Spool, LSD
Depending on what your application is, there are three main options: LSD, Locker, or Spool. An LSD, or Limited Slip Differential, allows the rear drive wheels to spin at different speeds when turning, and both wheels to be driven under a load. If one tire slips, they both still get full power. OEM terms for LSDs include Posi-Traction (GM), SureGrip (Mopar), and Traction-Lok (Ford). There are three common styles of LSD in use: cone style, clutch style, and gear style.
Cone-type or clutch differentials are what most OEMs used. In a clutch/cone configuration, pressure rings on the clutch stack are forced outward as the pinion cross shaft tries to climb the ramps of the gear teeth. As the torque increases, more compression is put on the clutches, coupling the axles, reducing slip, much like slipping the clutch on a manual transmission. These are best for street, racing, and drifting. Drifters prefer a clutch-style 2-way LSD which can lock up on acceleration and deceleration, providing lift-off oversteer for executing the perfect drift.
Geared LSDs such as the Eaton Truetrac use helical gears instead of clutches to do the job. This is the “smart” LSD, as they move power from one axle to the other in low-traction situations. This is a great design for performance street cars and most types of racing but is less suitable for drifting due to the “smart” nature of the power transfer.
Lockers such as the Eaton Detroit Locker are best for straight-line racing and off-roading. They work on the street much better than a spool or Lincoln locker, but they tend to be loud. In turns, they click, pop, and bang, because the locker portion has a spring-loaded interlocking gear that must pop out, or release, in turns. They are also quite pricey, but there is a cheaper alternative, the drop-in or “lunch box” locker. A lunchbox locker replaces the spider gears with a single coupler that has the same style of interlocking gear halves that pop out of sync when one tire needs to spin slower in a turn. These are functional, cheap, and easy to install. They are best for straight-line racing and off-roading.
How To Weld A Differential
So, you have made up your mind, you want to give it a shot. Alrighty, let’s get to it. First, you need a few things to make this happen:
- MIG welder: Any welder will work, but this is easiest with a good MIG welder with shielding gas. MIG will make less slag than a stick welder, and TIG welding gears might be tough due to the limited access. TIG works great with less slag if you have the room for the torch.
- Propane or Oxy-Acetylene Torch: You need to pre-heat the gears to get the best penetration, as the gears are typically 3/4 to 1 inch thick. Pre-heating makes a substantial difference and will help burn off any remaining oil.
- Jack and Jackstands: Safety first! You can do this job in the housing, under the vehicle, so be safe and properly support the vehicle. It is recommended that you remove the diff from the housing to avoid slag and other contaminations in the housing, but you can clean it out after, so it is up to you.
- Non-Chlorinated Brake Cleaner: This is a HUGE one, as the diff must be super clean, but you are going to be welding, so you can’t use the chlorinated stuff. While chlorinated brake cleaner product cleans better, it produces toxic gas when heated, even after it has dried. Don’t take the risk, use the non-chlorinated type.
Differential Welding Set-up
First, raise the vehicle and support it with jack stands. Never work under a car supported by a jack alone, and never use bricks or cinder blocks, they cannot safely support a vehicle, and you may be crushed. Work on a concrete floor with good jack stands, wheel cribs don’t work for this project, as you must be able to spin the axles.
Drain the housing, then remove the cover or third member. If you have a drop-out third member, you will need to unbolt the axles to remove the carrier. This is a great time to rebuild your housing with new bearings and seals. We recommend removing the differential from the housing and doing all the welding on the bench. Some builders do not do this, but it is highly recommended.
If your axle uses C-clips for retention, unbolt the locking pin and remove the cross pin. Push the axles towards the center of the housing, pull the C-clips out (a magnet or long needle-nose help here), then you can slide the axles completely out of the housing. You will need to remove the rear disc brakes (caliper and mount along with the rotor) to do this, but for drum setups only the drum needs to come off.
Unbolt the carrier and pull it from the housing. This may require a prybar. Be sure to keep the shims on each side of the carrier together per side. This is how the gears are adjusted, and you do not want to get this adjustment off, as you will have to do a full gear pattern set up if you do.
Mark the ring gear for its position on the carrier and then remove it. This is not absolutely necessary, but welding will cause a lot of spatter, and you really don’t want that in the teeth of the gears. You can remove the bearings as well, but you can tape them up with masking tape and then duct tape to protect them. They shouldn’t get too hot during the welding process.
CLEAN, CLEAN, CLEAN! You need to clean the heck out of the carrier. Gear oil is thick and smelly, and you don’t want it anywhere near the welding point. You can soak it in degreaser overnight and then pressure wash it or empty a few cans of non-chlorinated brake cleaner on it and scrub it or do both. The point is to make sure it is super clean, as any contamination in the weld will hurt your results.
Once the diff is clean and dry, set it up on the bench where you have access to the spider gears, which are on the sides of the carrier, where the axles pass through and on the top and bottom (no axle holes). Next, install the axles to hold the side gears in place. If they move and you weld them in the wrong position, you won’t be able to install the axles. Install the cross pin as well.
Pre-heat the gears and housing with a propane or oxy-acetylene torch. You are not looking for red hot here, not even close. You are looking for 300-400 degrees F. This will burn off any remaining oil and help outgas the metal, which reduces porosity. Move to welding immediately after reaching the desired pre-heat point.
There are different techniques used to weld the gears together. The main focus is welding each spider gear to the carrier itself and to each other. Some builders will fill the entire center will weld, adding pieces of scrap metal to the center area. This is unnecessary for most applications if the welds have good penetration, but that is a choice you get to make. You want thick, solid beads at all connection points. There should be no play or movement at all. Use lots of heat to get maximum penetration. Weld the entire perimeter of the gears through the openings. Most carriers have two large holes on either side, but some have exceedingly small openings which may require cutting to open the area for access.
Let the carrier cool completely, then reinstall the gear and reinstall the welded diff into the housing. Be sure to use new gear oil, no LSD additive is necessary.
When done properly, welded spider gears in your open differential will give you miles and miles of service without any significant issues. If you do choose this path for a street car, make sure you take the time to relearn how the car drives, it will be great in a straight line, but sharp curves and turns will be much different. Be safe and have fun with your new Lincoln Locker!
Step-By-Step, How To Weld A Differential
In the following photos you can see just how it's done! Now grab your welder and give it a go on your project!