How To Install A Car Horn Button
How to Hook Up a Horn Button
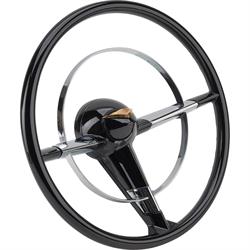
Installing a horn button on a steering wheel may seem like a time intensive task, but in actuality, it is not that difficult. The folks at Ididit, Inc. put together a video showing the installation of a horn button on a 1955-68 GM steering wheel and horn button onto one of their Ididit, Inc. steering columns.
The video starts out by showing the necessary tools you would need to install the steering wheel and horn button kit onto the column. It is quite a bit less than you would think, consisting of a Philips screwdriver, some sandpaper or abrasive scouring pad, ratchet with a 7/8 socket (shallow socket may work, but a deep socket would be preferred), some silicone sealant, a 3/8 drill bit (with a drill), and the Ididit, Inc. horn ring kit.
Jon walks you through disassembly of the wheel in order to install the new horn button kit. Jon shares some tips and tricks as he disassembles the wheel. The horn button kit comes with 2 new contact plates that are different sizes, primarily due to the large variances in wheel manufacturers. He mentions that you should try to use the larger of the 2 plates before using the smaller plate.
On some wheels, you may need to drill a new hole for the horn button kit and associated wiring. This is where the 3/8 drill bit comes into play. As you drill the hole, be mindful to not drill into the three screw holes that hold the horn button ring to the steering wheel. The horn hole should be placed at or as close to the 10:30 position as possible to line up with the horn cam. This will cancel the turn signals evenly as you return the steering wheel to the correct position.
Using the sandpaper or scouring pad, scuff the area inside the wheel to create a solid surface contact point for the horn button kit. Then he starts reassembling the wheel with the new horn button kit, starting with the horn trim ring and the horn contact pin. Once adjusted properly, Jon continues the assembly with the contact plate, plastic bushing, the physical horn ring, and the three point bushing with the screws that were removed earlier. Exercise some patience as you reassemble this because the barrels that surround the screws need to pass through the bushings to the wheel.
Take some time, watch the video, and then check out the bonus video we threw in. It shows another important Tech Tip on how to synchronize your wheel so those self-cancelling turn signals actually cancel!


