Upgrading the Cooling System for a Small Block Chevy
400 small block Chevy engines are known for being hard to cool compared to the 350 and smaller engines. A big part of the cooling troubles with the 400 engines is due to the siamese cylinder design they have, as well as the very large bore size. With this in mind, I decided to upgrade not only the water pump, but also add auxiliary coolant lines to the engine in my ’69 Chevy C/10.
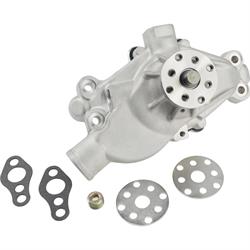
For this project, I selected Speedway Aluminum Water Pump. This pump has a high flow racing design impeller as well as extra-large ¾” shaft and bearings, but with a 5/8” fan pilot and standard 5 5/8” short water pump length. This made it an easy swap for the stock short water pump on my truck.
I also used new heater hose adapters. It didn’t make much sense to put the old rusty one into my new pump. For the pump, I used a Straight Adapter and for the intake manifold connection, I changed to a 90 Degree Adapter.
As I mentioned before, I also added coolant lines to feed cool water from the pump back to the rear ports of the intake manifold. The intake manifold on my engine already had coolant ports in the rear so it made perfect sense to use them. The Aluminum Water Pump does not come with the extra coolant ports, but the good news is there are two bosses cast into the pump that are made just for this. All that needs to be done is a simple drill and tap process to add adapter fittings. To add the extra coolant ports, I started by drilling the boss on each side with a 7/16” drill bit, then tapped threads with a ¼” NPT tap. Be sure to go slow and use plenty of lubrication when tapping the threads.
Once the threaded ports in the pump were done I screwed two 90 Degree AN6 Adapter Fittings in. Use some PTFE sealant on the NPT threads to avoid leaks. The AN6 side is a flare seal and no sealant is necessary there.
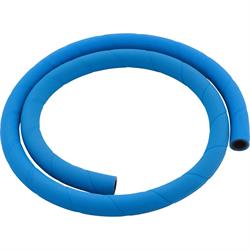
Once I had the new pump bolted in place, I test fit the hose length needed. I used two Straight AN6 Push-On Hose Ends. These hose ends simply push into place with no clamps required when using the matching push-lock style hose. I had some hose leftover from a different project, but the Speedway Push-On Hose works with these push-on hose ends.
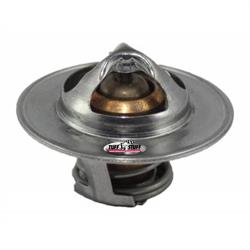
While I had the coolant drained, I decided to change to a cooler 160-degree thermostat as well. I used the Tuff Stuff Thermostat. I already had a 180-degree thermostat, so my plan is to change between the two depending upon the time of year. For the winter weather, I will change back to the 180-degree thermostat. In order to make thermostat changes simple, I went with a reusable Thermostat Gasket which is made by Mr. Gasket.
Once the thermostat was changed, all I had left was fill with coolant and go for a test drive. This installation was a complete success with no leaks and resulted in a very cool running engine. In the 85 degree weather, I tested it in the engine stays right at 160 to 165 degrees driving down the road. When idling for an extended time, it creeps up just slightly higher but still stays nice and cool around 180. All in all, I am very happy with the outcome.