LS Cam Swap
For those who don’t know about my project, I jumped on the LS bandwagon and I’m putting an LQ4 6.0 in my 1981 Buick Regal. My goal is to have a nice street car that I can use to pump gas and drive anywhere. After I purchased my motor, I knew I wanted to do some upgrades before I put the motor into the car. I read about a lot of different options to upgrade the hp, and after all this reading I concluded that for my budget, the best bang for my buck would be a camshaft swap upgrade. Knowing that there are hundreds of different options, I decided to go to the experts and get their opinion.
I went to the Speedway Motors Engine Shop and talked with Zach. He asked what my intention was for the car. I told him I wanted a car I could drive on the street, with roughly 400+ hp. Zach informed that the Speedway Motors team had put a 6.0 in their project Chevelle. They also did a cam upgrade, and the motor was pushing 500hp after it was complete. I decided if it's good enough for Speedway Motors' project Chevelle then it will be good for me. They put the Comp Cam 54-456-11 in the Chevelle.
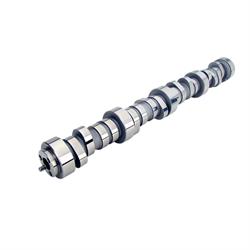
I decided to order the same Comp cam. The cam has a .607” intake value lift and .614” exhaust value lift with 219 intake duration and 227 exhaust duration (both at .050) with a 112-degree lobe separation. I believe the stock value springs are only rated to handle .500” of lift. So, with this cam I will upgrade the valve springs and the rocker trunnions to be able to handle the extra lift.
Since I was replacing the valve spring, I needed to remove the heads first. I started taking apart of all the loose ends on the top side of the motor. The wiring harness was removed, followed by all the coil packs and the coil pack brackets on top of the valve covers. I removed the intake manifold along with the fuel rail that was connected to the manifold. The spark plugs were also taken out.
After I had all that disconnected, I took off the valve covers. With the valve covers removed, I now had access to the rocker arms. It's important to check and see if any of the rockers have spring load. If they do, take those out last and unbolt the ones without spring load first. After you have the bolts loose, rotate the engine to relieve the spring load in the others, and then unbolt them. The rocker assembly will come off as one piece. With the rockers removed, you can now pull out the pushrods. At this point, I removed the heads on my engine.
To access the cam on the front of the engine, you need to remove the water pump if you haven’t already. Then, remove the harmonic balancer. The harmonic balancer bolt is difficult to remove, so what I heated the harmonic balancer around the bolt and proceeded to use an impact to loosen the bolt. I used a 3 jaw puller to remove the harmonic balancer. Now you are ready to take out the timing chain cover. Once you remove the timing chain cover, you can rotate the engine to push the lifters up into the lifter trays, then align the timing mark so your engine is sitting at top dead center.
After you remove the timing cover, you can now unbolt the top timing sprocket. Once the timing sprocket is removed, you have access to the cam retainer plate. Four bolts hold the cam retainer plate; remove the four bolts and the plate. At this point, you can rotate the cam to make sure that the lifters are sitting in the lifter trays. I replaced the lifters, so at this time, I removed the lifter and lifter trays. I then carefully removed the cam. I also decided I was going to replace the oil pump and timing chain on my engine, so I took those out as well.
To prep the new cam, I carefully cleaned it in with our solvent tank then applied oil on it before I was ready to install. Next, I slid the cam in until it fit snugly in the block. I could now install the retaining plate and torque the bolts to the correct torque. I then installed my new timing chain followed by the new oil pump. After the new oil pump was installed, the timing cover was ready to be installed.
At this time, I was ready to reinstall the top end. I installed the new lifters and put new head gaskets and head on using new head bolts. Next, I put the pushrods in and installed the rocker arms. You will want to lightly tighten the rocker arms, then torque the rockers that don’t have pressure on them. Then, you can rotate the engine until there isn’t pressure on the ones you didn’t get tight and tighten them. Now you are ready to continue reassembling the rest of the engine.