Coilover Conversion for a 1976 Chevrolet Laguna
Speedway Motors employee Steve is back to work on his 1976 Chevrolet Laguna, this time installing a QA1 Coilover kit in his front suspension.
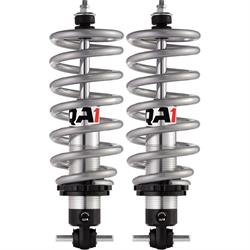
Wanting the front suspension adjustability that only a coilover shock can provide, I purchased a QA-1 Front Coilover Conversion Kit for my 1976 Chevrolet Laguna S-3. I got the QA-1 Kit from Speedway Motors (P/N 721-46713) with a 550 lb. spring because of the heavy front end weight of my big block powered Laguna. You can see the parts layout below, minus the springs.
This is a QA-1 Thrust Bearing and Washer Kit, Speedway Motors P/N 721-7888. While it's not vital to purchase the kit, I can't even begin to tell you how much easier it makes installing and adjusting the ride height and preload on the springs, and I highly recommend adding that to your coilover kit purchase. The QA-1 Coilover Thrust Bearing Kit comes with four thrust washers, and two thrust bearings, and will take care of both shocks.
One thing you will need to purchase - and is something you must use - is Anti-Seize Lubricant on the threads of the shock body, otherwise you'll gall the threads and your shocks will be ruined. I opted for the Aluminum Anti-Seize because it's silver colored and blends in with the shock finish quite well.
To start off the installation, you'll need to remove the original springs and shocks, in my case my front end had been completely disassembled so I had a clean slate to work with. Then coat the threads on the shock body with Anti-Seize, then thread the lock nut (shoulder up) all the way to the last thread (no farther), followed by the spring seat (shoulder up). At this point, you can install the thrust washer kit after coating the flat thrust washers and thrust bearing with anti-size, as well as the thrust bearing, and finally another thrust washer.
Pulling the shock rod to full extension, place the bushing retainer washer and an upper shock bushing (small ridge facing up), and now you're almost ready to put the shock in the car.
Place the spring small end down and make sure it's seated on the spring seat. Insert the shock and spring assembly into the upper spring pocket, making sure the spring seats in the pocket correctly. Now is a good time to set the adjustment on the shock, and make sure the knob is in a good position for future adjustments.
Now you can put the stud on the top of the shock through the hole in the frame with another bushing this time (small ridge facing down) followed by another bushing retainer. There is a standard and a jamb nut for the shock stud, at this point you can just use the standard nut just to hold the shock in place for now.
Pushing the shock assembly towards the center of the car, just line up the slotted holes in the lower shock mounting with the holes in the lower control arm and install the 3/8” bolts and nuts included in the kit.
NOTE: On some control arms the shock mounting holes could possibly need to be drilled out to 3/8”.
After everything is all installed, and tight, lower the car back on the ground. Bounce the suspension a few times to get everything seated, then adjust the spring seat nut to the ride height that you want, and tighten the lock nut, and you're done with the installation of your QA-1 Front Coilover Conversion Kit.
The QA-1 Front Coilover Conversion Kit comes with everything that is needed to make the conversion, all you need to do is pick the spring rate for your application. If you're unsure about what spring rate you need, any of Speedway Motors Street Rod or Muscle Car Techs will be happy to help you get the right spring for you.