Oil Pressure & Water Temp Gauges
Have you ever blown a motor? No one wants to lose an engine, but it does happen. And I’m sure we would all do anything possible to stop it from happening. Your weekly maintenance routine can help prevent early expiration of your power plant to some extent. However, you need the right diagnostic tools to monitor the health of your engine each week. Some people use data loggers or Mychrons, but not everyone can afford those systems. A cost effective solution is to install individual gauges, whether they be analog or digital. Almost everyone out there runs a water temp gauge, but not everyone runs an oil pressure gauge. In my opinion, everyone should run both. It gives a baseline to refer to each week, and allows you to track the oil pressure to see if and how much it drops over time.
I recently installed a mechanical oil pressure gauge on a 600cc Suzuki engine in my micro sprint. I chose mechanical instead of electrical due to the ambient heat in the area around the port on the engine. I, personally would rather have a stainless braided line run by my headers than wiring. My engine also has a stock electric oil pressure sender down by the oil filter, therefore I had to remove it to install the mechanical gauge system. Now, let’s look at the importance of these gauges.
The biggest benefit of having a water temp gauge or oil pressure gauge is knowledge. These tools give you information on how your engine is running and they can be compared to a blood pressure cuff or a simple oral thermometer at the doctor’s office. They may not seem like a big deal, but are vital to keeping up with your engine’s life. It is also a good reference to know if you are using the proper weight oil.
Looking at heat vs. pressure is a great judge of viscosity. In addition to your weekly maintenance, you will want to check that these gauge’s fittings are still tight. You will also want to keep a record of your oil pressure readings each week at idle. This way if you’re sitting in staging and you notice your oil pressure is down 10 or even 20 psi, you know to shut down your engine.
I recommend adding an “oil pressure @ water temp” reading to your weekly racing records. This way, you can see if there’s a difference in oil pressure at the same water temp even if it’s colder outside, humid, or even hot and dry. All of this information helps keep your program consistent, and helps you know your engine better. Let’s take a look at all the parts required to install an oil pressure gauge in your car.
The first thing I did was install the gauge itself. I went with Speedway’s Stewart Warner Mechanical Oil Pressure Gauge, part #665-82323W. It has a 2-1/16” body, is backlit, and comes with all hardware needed. I found a location on my dash that the gauge would fit into, then drilled the hole. I found it best to use a 2” hole saw, then used a small flap wheel on the end of a drill to make the hole just a bit bigger to fit the gauge.
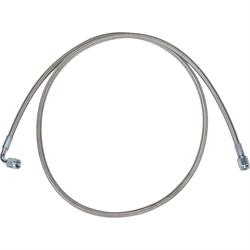
With the gauge in place, I installed the AN Adapter Fitting, part #617-95201, on the back of the gauge to adapt to a -3AN. Next, I removed the stock electronic sending unit from the motor and used an 1/8” NPT to -3AN Fitting on my block, part #617-60411. From there, I installed the 48” -3AN Steel Braided Line, part #910-31895-3. This line has a 90° fitting on one end to be able to turn right off the motor fitting and tuck behind the headers.
The 48” length fit perfectly in my car and ran up to my gauge, mounted on the right side of my dash. All that was left to do at this point was wire in the back light. Installing this gauge only required four parts and took about 30-45 minutes to install. Remember, races are won in the shop. Installing an oil pressure gauge is worth the time for peace of mind!