G-Comp Rear Suspension 62-67 Nova
Kit Contents:
- 350003.1 G-Comp Chassis Brace
- 350003.2 G-Comp Front Supports
- 350003.3 G-Comp Upper Rear Crossmember
- 350003.4 G-Comp Panhard Bar
- 350004 G-Comp Rear Truck Arms
- 350024 G-Comp Rear Panhard Bar Brackets
- 350023 Panhard Bar Hardware, Nova
- 350003.5 Hardware Kit
- Remove Rear Suspension: Raise the car and support it with jack stands or a lift. Remove; the exhaust, drive shaft, rear end, and all rear suspension components including the rubber bump stops. Disconnect fuel lines and remove fuel tank. Remove fuel lines, brake lines, and E-brake cables from bottom of car. These can be re-routed through the holes in the chassis brace after installation.
- Prep for Welding: Raise the chassis brace into its approximate position and mark all areas that will be welded. These areas should be ground down to bare metal to provide the proper conditions for welding. (Any carpet or padding installed on back side of weld areas should be removed at this time.) To position the chassis brace, the rear flanges of the chassis brace should be clamped tight against the leaf spring boxes while the chassis brace is pushed up against the bottom of the car and centered left to right.
- Repeat step two with the rear cross member and front supports. Depending on the car, minor trimming/fitting may be required. Bolt the upper rear crossmember to the car using the four supplied 5/16”-18 x 3/4” grade 5 bolts. These bolts will go into the factory shock bolt holes. This will locate the crossmember in the proper position.
- Tack-Weld Crossmembers: Once all areas that will be welded are prepped and cleaned, then the cross member, chassis brace, and front supports can be tack welded into place. (Some grinding and trimming may be necessary to provide proper fit up.) Note: Do not fully weld the crossmembers at this time! Only weld enough to securely hold the parts in place during mock up. Hint: Weld in places that can be easily accessed with a grinder in case it becomes necessary to move or adjust the parts.
- Prep Rear End: If re-using a rear end, tear down the rear end to just a bare housing. Remove any spring perches or brackets. For the saddles and panhard bar bracket to be positioned properly, it is critical that they fit tightly against the bare axle tubes. Any extra material on the tubes will need to be ground away to provide a proper fit. Prep for welding by removing all paint, oil, and grease where new brackets will be installed.
- Assemble Truck Arms and Rear End Housing: Install truck arms onto the front crossmember using the supplied 3/4"-16 X 5-1/2” grade 8 cam bolts and spacers. NOTE: Install the cam bolts in the center of adjustment as shown. The flat side . of the bolt should be facing upwards. Install rear end housing using the supplied U-bolts and nuts as shown above above. Do not fully tighten u-bolts at this time.
- Adjust Rear End: Raise the rear end to the desired ride height, relative to the car. (Suggested ride height is about 12 ½” center to center for the shock bolt holes). Support the rear end at this height and center it in the car. The center to center distance on the top side between the two truck arms should be 39” as shown. The distance from the outer flange of the rear end housing to the truck arm should be the exact same on both sides. Once the rear end is centered, and at ride height, spin the rear end housing to achieve the desired pinion angle. Now, double check that the rear end is in the proper location and tighten down the U-bolt nuts.
8.** Tack-Weld Saddle Brackets**: Once you are sure the rear end is located properly, tack-weld the saddle brackets to the rear end housing. It is recommended to double check all measurements after tack welding.
- Panhard bar: Secure the panhard bar to the rear crossmember using the supplied 5/8”- 11 x 6” grade 5 bolt and nut. Adjust the panhard bar so that there is about ½” of thread showing and tighten the jam nut. This will allow for a small amount of adjustment in both directions. Now, raise the panhard bar bracket into place on the rear end and bolt the panhard bar to it using the 5/8”-11 x 3-1/2” grade 5 bolt and nut. Rotate, or “clock” the bracket on the rear end so that the bolt is horizontal. Double check that the bracket is in the proper position and tack weld the bracket to the rear end housing. As shown, the panhard bar bracket should be about 17 ½” from the center of the housing. The center of the housing can be found by measuring the flange to flange distance and plug or third member are centered, this is often not the case. You must measure to find the center! NOTE: There are 3 possible locations for each end of the panhard bar, use the mounting holes that make the panhard bar level with the ground at ride height. This will vary depending on ride height.
- Check Alignment and Clearances: It is recommended at this point to cycle the suspension though its travel and check for any clearance issues. This is also a good time to double check that the rear end is aligned properly with the car and the pinion angle is correct. (use the cam bolts on the truck arms to adjust the alignment)
- Finish Weld: Remove the rear end, panhard bar, and truck arms from the car. Fully weld the cross member, chassis brace, and front supports to the car. Weld the saddle brackets and panhard bar bracket to the rear end. NOTE: It is a very good idea to only weld a small bead at a time, then move to a new area and allow the first area to cool completely before welding further in that area. This will greatly reduce the risk of warping, especially on the rear end housing.
- Re-Assemble: Once all of the welding is complete everything can now be re-assembled.
- Secure the truck arms to the chassis brace using the cam bolts and cam spacers as shown in step 6. Torque the nuts to 120 ft-lbs.
- Now is a good time to fully assemble the rear end by installing gears, axles, and brakes. (This can also be done after installing the housing into the car)
- Raise the complete rear end into position. Attach the rear end to the truck arms using the supplied u-bolts, washers, and nuts. Torque nuts to 220 ft-lbs.
- Install the pan hard bar using the 5/8”-11 x 6” grade 5 bolt and nut on the crossmember end and the 5/8”-11 x 3 ½” grade 5 bolt and nut on the housing end. Torque both bolts to 120 ft-lbs.
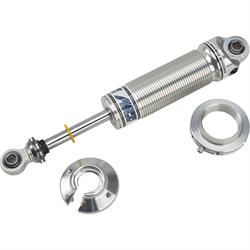
- Install your coil over shocks using the supplied 1/2”-13 grade 5 bolts. The 2 ¾” bolts and 3/16” wide spacers are for the bottom while the longer 3” bolts and 5/16” spacers are for the top. Torque the coil-over bolts to 65 ft-lbs Note: This kit is design to use shocks with a compressed length of 10” and an extended length of 14”. Shock ends should be ½” bearings with a mounting width of 1”. For recommended part numbers please visit our website or contact one of our tech experts.
- Re-install; drive shaft, fuel tank, fuel lines, brake lines, and E-brake cable etc…
- Bleed the brakes.
- Fill the rear end with fluid.
- Install wheels and tires
- Alignment:
- Lower the car onto the ground and check for desired ride height. Adjust ride height if necessary by raising the car and spinning the adjusting collar on the coil-over.
- Once the ride height has been set, lower the car onto the ground and make sure the rear end is centered in the car body. Adjust the panhard bar if necessary. Lengthening the panhard bar will move the rear end toward the passenger side, while shortening it will move the rear end toward the driver side.
- Now that the ride height is set and the rear end is centered perfectly in the car, the rear end can be aligned by adjusting the cam bolts on the front of the truck arms. NOTE: This is difficult to do accurately and a professional alignment is recommended. This method will get you close enough to drive the car to an alignment shop.
Get a Copy For Your Toolbox
Product Features
This product contributed to making the Team Speedway '65 Nova the GoodGuys Autocross Champion in 2016!
Designed to give your car a great ride and handling without the need to install a roll cage due to added chassis stiffness! Speedway Motors' G-Comp line of Chevy II Nova suspension parts is engineered for performance, strength and value. This G-Comp rear suspension kit is a complete assembly for the 1962-67 Chevy II Nova. This Pro Touring rear kit is an all-new performance system engineered for optimum handling and vastly improved control. G-Comp rear kits will turn your Chevy II Nova into a real G-machine, ready to take on the autocross, road course, or the street.
- Used by Robby Unser in autocross competitions
- Designed to complement the G-Comp front end kit
- Replaces leaf springs with coilover shocks
- Designed ride height is 2" lower than stock and is easily adjustable with coilovers
- Trailing arm articulation - provides superior forward bite
- Eccentric Cam trailing arm mounts accurately position and align rear wheels
- Panhard bar to control lateral movement of rear end - clean, simple design
- Three positions of panhard mounts allow quick roll center adjustments
- Chassis brace made from .120" wall steel tube and is easily located off leaf spring mount
- Pass through tubes are welded into the chassis brace for routing brake lines and wiring
- Chassis brace contains a dropped saddle for drive shaft clearance
- Front support tubes tie the chassis brace to the front of the car
- Chassis brace reduces chassis flex and provides a rigid mount for the trailing arms
- Upper crossmember includes shock mount holes and weld directly to the chassis
- Kit works with both stock wheel wells and mini-tubs
- 7 gauge steel shock mount crossmember bolts to OEM shock mount holes
- All hardware is included to mount truck arms and panhard bar
- Brackets are included to mount the trailing arms and panhard bar to existing rear end
- Rear sway-bar NOT included on standard kits
- Allows for 8" wide wheels if using stock wheelwells
- Tubing wheelwells is not required for use of this kit
- Recommended for cars up to 500HP
Recommended Coil-Over Shocks for G-Comp Series Rear Suspension:
1061340CT - AFCO Street/Pro-Touring Coilover Shock (non-adjustable)
1063845PTCZ - AFCO Pro-Touring/Race Coilover Shock (single adjustable)
To learn more about the G-Comp line of performance muscle car suspension parts.
Read about the G-Comp suspension packages in action on our 1965 Chevy II, as featured in this article from Super Chevy Magazine; A 1965 Chevrolet Nova that Crushes it on the Track!