New Hubs for a Traditional-Style Hot Rod
Are you in the process of considering what type of brakes to run on the front of your hot rod? If you are building an old Ford and are aimed at producing a car with a period correct look you might be thinking of running drum brakes. I am working on my old Ford Roadster as I write this and am finally ironing out the look I have been after. I want my little '29 to look like it was built in the early '50’s during the golden age of hot rodding. Some people believe that you must run a disk brake kit on the front of your car to be safe, and that simply is not true. Drum brakes, when properly adjusted stop just as well as a disk set up. I can appreciate the many benefits of disk brakes. They are easy to service, find parts for, and they are lighter in most cases. Wanting a car that looks correct is important to me however so I went to work on the front of my car with a goal of having a smooth and reliable set up that I could drive anywhere and as often as I pleased while still looking the part. In this tech article I want to focus on the heart of any front brake set up and that is the hub itself.
In thinking about parts there is nothing better than old original parts in most cases. I already had some hubs set aside for my Model A roadster build. I was originally going to use some 1941 stock front hubs. They work great, and with the big Ford 5 on 5.5” pattern they were just right for the early wire wheels I’d be running. The only problem with the ones I had is they are still attached to the original, rusty, greasy, and pressed on ’41 drums they left the factory with.
Removing the hubs from these drums is no treat. If you have never done it before you might be tempted to put them in a press to attempt pressing the hub off, but this seldom goes off without incident. The studs are what lock the drums on and the best way to remove them without damaging/cracking the hub is to grind the head off from behind and then press them out one by one through the outside. This of course ruins the studs which need to be replaced. I have two kids at home and a full time job which keeps me very busy so I decided to store these old drums and hubs for later when I am retired and have more time on my hands. To speed up the process Speedway had just the part for me! Part 91065450 is a little gem that makes life so much easier. It is a reproduction 1940 style hub for mounting on early Ford Spindles such as part 91032104.
The hubs are brand new with fresh bearing surfaces. The only way to tell them apart from the original Ford antique pieces are the dust caps. These utilize a press in modern style dust cap where originals use a threaded cap. This didn’t bother me because I was planning to have these hidden behind the “V8” caps on my old wire wheels. The best part about these are they are clean with no rust and are sure to give me years of good service going down the road as fast as I dare to drive.
This is how easy they are to install. This is what I ordered from Speedway to get the job done. I ordered two new hubs, and the bearing and seal kit 91065455 which services both hubs. While I was placing my order I also added a new tube of bearing grease from Lucas Oil Products, and a great little wheel bearing grease packing tool, part 91089635.
I began with my early ford spindles mounted to a forged I-beam dropped axle. I am running 1940 Ford backing plates on my hot rod. They are not self-energizing but should still get the job done. New brake pads are on the way, but I decided to go ahead and get the hubs mounted up regardless.
I cleaned everything really well making sure there wasn’t any old dust or debris on the spindle “candlestick”. I bolted up the backing plates and test fit the bearings in the hub.
When you purchase the bearing and seal kit it comes with extra races. These are not needed. They are included in the kit in case you need to replace a race, but these new hubs have new races already installed. I decided to put these in the tool box in case I needed replacements in the future. Once I could see everything was going to fit I fired up my grease gun. In the past I have always packed wheel bearings by hand. It was a task passed down to me by my father that I will one day pass along as well wondering if future generations will require such wisdom. When I purchased a wheel bearing packing tool I felt as if I’d be cheating somehow. The tool is very straight forward in how it works. It is a threaded rod with a hole for grease to squeeze out.
The grease is controlled by two plastic cones that sandwich the bearing and force grease through the rollers. It worked really well. It packs the center hole of the bearing with grease as well, but this comes in handy because I did a little hand packing just to be sure things were plenty lubricated. Once the inner bearing was finished I installed it into the hub and then tapped in the grease seal.
The fit of the seal was just right and didn’t require any major force. Just a few taps from a hammer and wood block and it was done. In put the hub onto the spindle and began packing the outer bearing. The wheel bearing packer was proving its worth now because it was saving some time for sure. Once fully packed I installed the outer bearing into the hub and installed the washer and spindle nut.
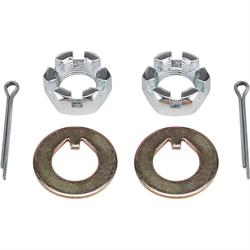
It is important to note that Speedway Spindles do not come with new spindle nuts. I am using some old originals, but if you need some new hardware Speedway has part number 910616004 always ready on the shelf.
The hubs spin perfectly true as one would expect. The job felt too easy. I did the exact same task on the driver’s side to complete installation of both hubs. After that I mounted a new drum, part 91065400, wire wheel support, 91065470, and my wheel. Everything fit perfectly and is ready to roll down the road. This is one more task crossed off of a long list before I can take my 7 year old around the block in our hot rod!