How to Install a Hydraulic Throwout Bearing
One of the most challenging aspects of swapping drivetrains in a vintage car can be figuring out the clutch linkage for your manual transmission. One way to simplify things on cars with GM transmissions is to use a hydraulic clutch release bearing. This eliminates the need for complicated mechanical linkage, as the bearing operates on hydraulic pressure developed by a master cylinder. After fabricating a mount for the master cylinder, all you need to do is route hydraulic lines to the release bearing. Speedway's vast street rod catalog features all kinds of problem-solving parts for classic cars, including a hydraulic release bearing, Speedway master cylinder, and braided stainless lines used in this installation. To make things even easier, we used Speedway's set-up tool for hydraulic release bearings. This innovative tool eliminates the guesswork in setting the clearance on the bearing, which is one of the most vital steps in installing this style of bearing.
A This special tool from Speedway Motors makes it easy to set up a hydraulic clutch release bearing on a manual transmission.
B To install the hydraulic release bearing, you first need to replace the transmission bearing retainer bolt in the 2 o'clock position with the supplied stud.
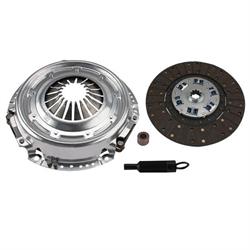
C The release bearing then simply slides onto the bearing retainer shaft. You need to make sure the newly installed stud is between the two fittings on the release bearing, which prevents the bearing from rotating. If necessary, one or more of the supplied shims can be used to create correct clearance between the bearing and clutch fingers. The shims are shown here for illustration only, and may not be necessary on some installations.
D With the clutch disc, pressure plate and bellhousing installed on the engine, the flat side of the Speedway tool is placed flat against the bellhousing, and the rod is pushed in until it just touches the working surface of the pressure plate fingers.
E Next, place the forked side of the tool against the front of the transmission and push the rod in until it just touches the working surface of the release bearing.
F Now, look at the indicator O-ring to determine the amount of clearance you have. Each slash mark on the tool equals .100-inch, and clearance should be read from the edge of the O-ring, not the center. Follow the release bearing manufacturer's recommendations for clearance. If you have too much clearance, you can use the provided shims to decrease it. If you have too little clearance, you will need to move the bearing closer to the transmission, which may require machining the transmission's front bearing retainer in some instances.
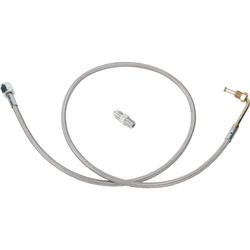
G This photo illustrates the installed release bearing inside the bellhousing. Note how the bleeder fitting is against the stud, which allows the braided line to the inlet fitting to be routed through the clutch fork opening in the bellhousing.
HYou will need to use a master cylinder to actuate the hydraulic release bearing. Speedway offers this 3/4" bore master cylinder part number 91025680 which is simple to adapt to almost any clutch pedal.