Leak Down Check on a Micro Sprint Engine
Leak Down Test on a Micro Sprint Engine
Have you ever leaked your race engine down? If not, have you ever thought about leaking your engine down, or wondered why people would do such a thing? It is most certainly an important procedure and should be part of a weekly maintenance routine. In this article I will explain why it is important, how to perform the procedure, and discuss frequency of leak down testing on your race engines.
An internal combustion engine makes power by first drawing air and fuel into the combustion chamber. It then compresses that mixture of air and fuel and gets introduced to a spark. As a result, a combustion takes place which powers your engine. As you continue to race your engine, the containment of this power can be lost due to wearing of piston rings, valves, and cylinder walls. Engine performance will suffer as a result of this wear.
A common test of an engine’s ability to compress the air-fuel mixture is an engine compression test. A pressure gauge is connected in place of the spark plug. The engine is then cranked to create a pressure reading. A compression test is a good way to check the engine’s ability to create pressure. The gauge will read the positive pressure created by the cylinder.
An engine leak down test is basically a compression test in reverse. Instead of measuring the engine’s ability to create pressure, compressed air is introduced into the cylinder through the spark plug hole and you measure the percentage of the air escaping (or leaking) from the cylinder. The loss percentage will indicate the condition of the cylinder and overall condition of the engine.
No engine will have perfect sealing with 0 percent loss. Five to 10 percent loss indicates an engine in great to good running order. An engine between 10 and 15 percent can still run OK, but it’s time to consider having the engine overhauled. Above 15 percent loss is certainly time for a tear down and rebuild! Twenty to thirty percent or more? Major problems. The percent of leakage should also be consistent across the cylinders. Any great differences indicate a problem in that specific cylinder.
I will be showing leak down procedure examples using my own personal Suzuki 600cc engine. Depending on make and model of the engine, certain tools may vary, however the procedure will be the same.
Before you begin, you will need to have the following:
- Air Compressor - 910-5179105
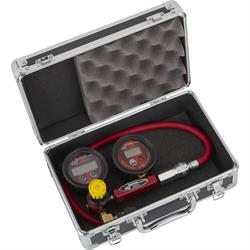
- Leak Down Gauge - 475-73014
- Spark Plug Socket - 910-81580
- Ratchet - 910-2957
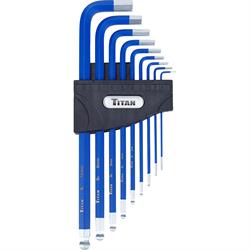
- Metric Allen Wrenches - 728-12714
Step 1: Remove the spark plugs with a spark plug socket and crank cover cap with metric Allen wrench.
Step 2: Using your 14mm socket, rotate the crank to put the cylinder to be tested at Top Dead Center on the compression stroke. Tip: Always rotate crank clockwise. Don’t turn the engine backward if TDC is missed. Go around again. You can also insert a long screwdriver or extension into the spark plug hole when turning the engine over. When the screwdriver stops rising or falling, you’re at TDC. Once you have performed this task a few times, it becomes easier to find TDC and the screwdriver or extension will not be needed. Typically, when the ratchet meets resistance, two of the four pistons will be at TDC. In a four-cylinder motorcycle engine, usually cylinders one and four and two and three are at TDC at the same time.
Step 3: Record leakage percentage for each cylinder. Thread spark plug adapter from leak down kit into one of the cylinders that is at TDC. Connect your compressed air to the leak down gauge, then connect the leak down gauge to the spark plug adapter. It is important to note that only one of the two cylinders will have all the valves shut. That is the cylinder we want to find to measure air leak. If you are on the opposite cylinder, your gauge will read 100% leak due to valves being open which will be your indication to move to the other cylinder. Once you get a good reading, record your result on a notepad and move on to the next cylinder. Tip: Knowing the firing order on your engine will help move through this process quickly. This will help you determine which cylinder to check next when you rotate the crank for the next leak test. In 600cc bike engines, the firing order is 1, 2, 4, 3.
Repeat steps two and three until you have checked every cylinder. I recommend performing this procedure twice in a row to ensure accuracy and consistency in leak down readings. It is important to read the instructions on your leak down tester kit. There are many variations of leak down kits and the use of these kits may vary depending on the type of kit you own.
With this procedure being implemented into your maintenance routine, you will now be able to confidently race knowing you are certain of the condition of your engine. Plus, you will be able to safely determine when it is time to send your engine back to the builder for an overhaul. A lot of users base their overhaul timing on number of races completed but may never be certain if the overhaul was necessary or not. This procedure will provide clarity on engine condition as well as give you certainty on when you should stop putting time on the engine and send it back for service! Perform this procedure every week and you will never have to question rebuild timing again.