Reinforcing Lower Ball Joints
If you're going to do any performance driving, whether it be Oval Track, Road Course, or Autocross, one of the weak links in your front suspension is the factory stock press-in Lower Ball Joints. If you toss your car in the corner hard enough a few times, before long that ball joint is going to pop right out of the lower control arm. Don't think the world has ended if that happens, all you need to do is pick up a steel lower ball joint sleeve and the matching screw-in ball joint for your application from Speedway Motors. The 1976 Chevrolet Laguna S3 that built for SCCA Autocross competition was a prime candidate for the screw-in lower ball joint upgrade. We used the steel lower ball joint sleeve for the K727 Style screw-in ball joint (P/N 910-34816). While it may look like an intimidating job, like they say, it's not as hard as it looks. A little planning ahead makes things a lot easier. We made a wooden jig and used some (2) 5/16” x 1-1/4” lag screws and screwed the lower control arm down to the jig using the 2 holes in the lower control arm where the lower shock tie bar mounts. Doing this gives you a sturdy workpiece that will not move during the drilling process.
Using a 2-1/2” bi-metal hole saw chucked up in the drill press remove the original seat where the stock press-in ball joint went. Leave a small part of the original lip to help support the ball joint sleeve. During the drilling process, take your time and go slow, and be sure to have plenty of spray lubricant to make sure the hole saw and the control arm doesn't get too hot. This is very important; once they get hot the bi-metal hole saw will be dull in a matter of a few short minutes. Then your project gets put on hold while you go and chase down another hole saw.
This is the stock ball joint hole before drilling it out for the screw-in ball joint sleeve with a 2-1/2” bi-metal hole saw.
When drilling out the original pressed-in ball joint seat, move the lower control arm in slightly to leave a small lip of the original ball joint seat intact for added support for the screw-in ball joint sleeve. We recommend this because of the severe forces that will be pushing against the lower ball joint during autocross competition. If you're building an award winning Pro Touring car, you may not choose to do this, to keep everything looking as clean as possible. We're going for strength and durability, so as to not have any issues with a failure during competition.
When the drilling is done, all that's needed is some minor clean up with a half round file and you're ready to fire up the welder.
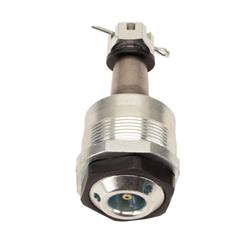
We chose to have the screw-in sleeves Tig welded, this kept the heat controlled and reduced the chance of heat distortion of the threads. Besides, Tig welding just looks good. After all the welding is finished, all that's needed is to prep them for painting or powder coating. Then install the lower control arm bushings and the screw-in ball joint. Then they're ready to be installed in your car, and you're ready to go out and tear up the track without fearing that you'll have a ball joint failure.