How to Build a DIY 3 link Suspension
As much as we all love muscle cars, the suspension on these 40+ year old cars sometimes just isn’t up to today’s standards. For popular cars like Camaros or Mustangs there are lots of different options for upgraded suspension kits. But when it comes to the less popular cars or like in my case, where you just want something different, you get to fabricate something of your own. While my ‘67 Cougar shares most of its’s suspension with the heavily supported mustang, I decided to go a bit further than just bolting on a suspension kit. With the goals I have for the car leafs just weren’t going to cut it, and most of the aftermarket suspension kits were hindered by the flexible unibody chassis. Instead of adding bracing here and there, I decided to go all out and build a complete custom frame for the car. This created a blank slate and allowed me to design my own adjustable 3-link rear suspension. It will utilize a Speedway Motors G-Comp watts link to keep the rear end right where it needs to be, and adjustable coil-overs. But, for now, we’ll focus on the three-link fabrication.
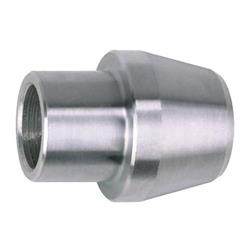
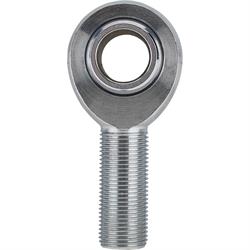
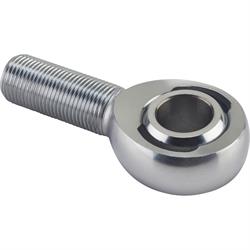
Speedway offers a multitude of options for different types of suspension links. For my car I chose to create my own heavy duty chromoly links using Speedway components. I used Speedways ¾”-16 weld-in bungs both right hand #910-02965, and left hand #910-02966. These bungs are design to fit a tube with an inner diameter of one inch. Other sizes are also available for different applications. Along with the bungs I picked up 6 Speedway ¾” Chromoly Heim joints, #910-02136 for the right hand threads and #910-02336 for the left hand threads. These chromoly heims joints are the ultimate in strength and durablility. They will definitely hand all of the horsepower I can throw at them! I also picked up a pack of both right hand #175-6047-RH and left hand #175-6047-LH jam nuts.
Since neither the heims nor the bungs are labeled I like to mark LH or RH on them with a sharpie as I pull them out of their packages. You want to make sure each link gets one right hand and one left hand end.
To start, you will need to know the exact desired length of each assembled link. In my particular case, the suspension was designed to use links that are exactly 28 inches from pivot to pivot. Before cutting the 1 ¼” x .120” wall Chromoly tubing to length, there were a few measurements I needed to take. First was to measure the length of the weld-in bung. In this case they were right at 1 inch.
Next thread a jam nut about two thirds of the way onto the heim joint and measure from the jam nut to the center of the hole. For a ¾” heim, this distance is 2 inches.
This means the heims and bungs use up three inches per side. So for my 28 inch links, I needed to cut a 22 inch piece of tubing.
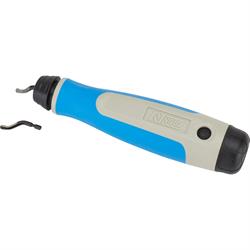
If you’re using an abrasive saw like me, there will be lots of burrs leftover from cutting. I like to use a 90 degree air grinder with a 2” roloc sanding disc along with a hand deburring tool like speedway #910-89458 to remove the burrs inside and outside. Once the burrs were removed I used a Scotchbrite disc to take the mill off each end of the tube. This will help keep any impurities out of the weld.
With the tube prepped all that was left was a quick wipedown with some acetone and I was ready to fire up my welder. Be sure to wipe down the weld bungs as well. These will typically have a rust preventative oil on them that will affect the weld quality if not removed. Note that since I am using a TIG welder, I left little to no gap between the tube and the bung. If you are going to MIG weld these, I recommend beveling the end of the tube so you can get full penetration with your welds. If you are not confident in you welding abilities, find a buddy who is or take them to a professional.
Add a few small tack welds to each bung and then double check your length before fully welding the bung in place. If you have the option I’d go ahead and assemble them and install them to make sure everything checks out before welding completely. Unfortunately I don’t have my rear end housing yet, so I did not have that luxury. The best I could do was hang my brackets in place and wish I had a rear end housing to weld them to!
After a couple minutes of welding my first suspension link was done. Some work with a ScotchBrite pad and the link will be ready to paint or powdercoat. Now, I just need to do this two more times...