Chevy C-10 Rear Lowering Spring Install
Whether you are looking to change the look of your truck, get rid of your tired rusty springs, or just upgrade the ride quality of your truck, Speedway Motors has you covered with stock height and lowered spring options.
When I purchased my 1966 Chevy C-10, the suspension was tired and rotted and the stuck V8 motor had been traded out for a running inline 6. With the inline 6 in and the days of heavy hauling out, the truck was ready for an altitude adjustment. I decided to start with the rear suspension as the bed had been removed to clean up and re-assemble. The parts I used to accomplish this rear drop are listed below.
Rear Suspension 5” Drop
5” drop springs (1pr) = $94.99
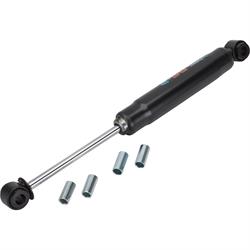
Wester Chassis Drop shocks (x2) =$44.99(x2)
1960-72 Chevy Pickup Coil Spring Retainers (1 Set) = $19.99
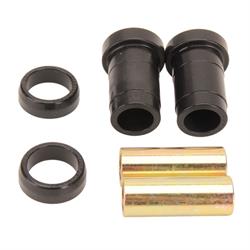
60-72 Trailing arm bushings (1 set) = $17.99
Total cost for the rear = $222.95
Speedway also offers a Chevy Pickup Truck Rear Suspension Lowering Kit, which is a complete kit that contains 5" drop springs, shocks, deluxe trac bar, hardware, coil spring retainers, and shock relocation kit for only $329.99. This kit was put together because it corrects the shock angle and centers the rear axle which can sometimes become an issue with a larger drop. I didn’t go with this kit as I already had everything except for the springs, shocks, and retainers.
The trailing arms that were on the truck when I bought it were quite rusty and had been welded back together at one point, luckily for me there was a spare set in the cab that cleaned up nicely. I used a wire wheel and some chassis paint to clean up the arms and then installed new Urethane Trailing Arm Bushings before re-installing on the truck.
The next step was to install the 5” Drop Rear Springs. I found it easiest to bolt the trailing arms to the center cross member (through the bushing end) and let the rear of the trailing arm rest on a floor jack for the next few steps. Next, I took the drop spring and the Spring Retainer and bolted the spring to the trailing arm. It is important to ensure that spring retainer is seated nicely in the spring for a secure fit.
The next step was to take the jack and jack it up until the top of the spring was resting on the bottom of the fame. One the spring was in position, the top spring retainer could be bolted in place, finishing the drop. Once the drop spring was bolted in place, it was time to install the new Drop Rear Shocks to keep the truck riding smooth. I found it much easier to bolt the bottom of the shock into place, and then let the shock push itself into the upper mount. I repeated the same steps on the other side and then took it for a test drive. I can’t believe how much of a difference it made! It was a night and day improvement in the comfort and ride quality.
This is a picture of the finished project taken from just over the rear axle looking towards the front of the truck.
The next phase of this project will be to rebuild the front steering and suspension and lower the front 3", Check back for more pat numbers, articles, and pictures covering these projects in the near future.